This tutorial assumes that you have XAMPP 1.7.3 installed.
The procedure should be the same for other versions of XAMPP.
A XAMPP installation procedure for Windows XP can be found here.
Click on images for full sized versions.
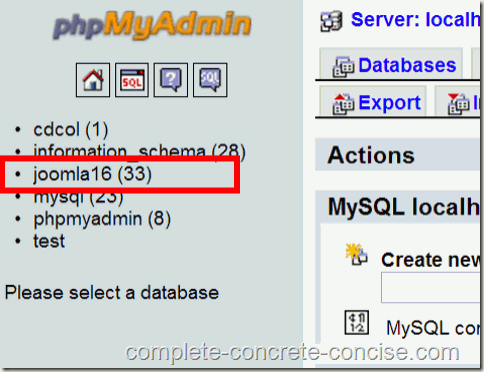
(1) Enter http://localhost/phpmyadmin into your browser’s URL field. This will bring you to the phpmyadmin main page.
 (2) Select the database to which to add a new user by clicking on it:
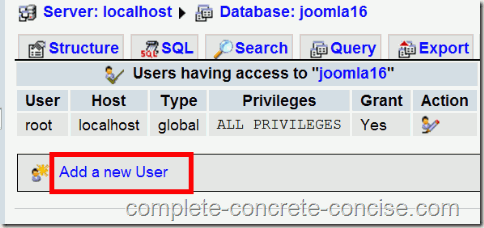
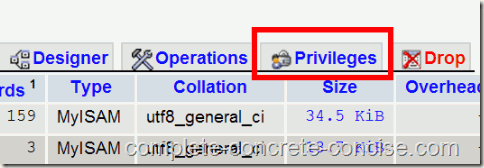
 (3) Click on the Privileges tab:
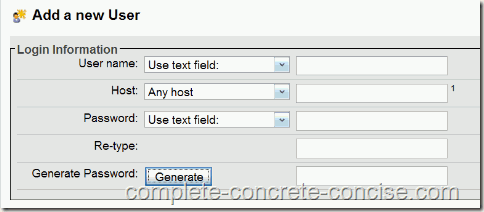
 (5) Fill in the user information:
 User Name: Leave the dropdown selection as Use text field and enter a user name in the edit box on the right side. A user name may be a maximum of 16 characters in length. The MySql documentation recommends using only ASCII characters in the name. It would probably be safest to restrict yourself to lowercase letters, uppercase letters, and / or digits.
Host: since this is for XAMPP, select Local from the dropdown box.
Password: if you want the user to have a password, then leave the selection in the dropdown box as Use text field and enter a password (up to 16 characters, composed of letters and / or digits) into the edit box on the right. If you don’t want the user to have a password (for the password to be blank) then select No Password from the dropdown box. Alternatively, you can allow the system to generate a password for you (remember it or write it down, since you will need to pass that password on to applications that need it).
(6) Leave all other settings as they are.
You can now use this user name and password instead of root and no password when you configure the database information for applications like Joomla! or WordPress.
