These instructions are for installing the GNOME Session Fallback in Ubuntu 12.10 running the Unity Desktop.
Installation instructions may be the same or similar for other versions of Ubuntu or for other Linux distros, but no guarantee is made.
If you are changing desktops because you are totally lost / confused by Unity, I suggest reading this tutorial and giving Unity a chance. The mentioned tutorial is for Ubuntu 12.04, but should be the same or very similar for 12.10. Eventually, I will have an updated tutorial for 12.10.
Of course, if you really hate Unity, then GNOME Session Fallback is an alternative desktop.
Some images may be clicked for full sized versions.
What is it?
GNOME Session Fallback is the most basic version of GNOME you can install. The 3D features and requirements of the standard GNOME Shell are not present.
It is the closest you can get to the original GNOME 2 desktop. The GNOME 2 desktop is the one most users would recognize as the familiar or traditional desktop.
If you want a true GNOME 2 desktop experience, then you need to install MATE.
MATE is a fork (a development branch that has split from the main branch) of the original GNOME 2 project to preserve it.
GNOME 2 is no longer supported or developed – it has been superseded by GNOME 3.
MATE is the new GNOME 2.
GNOME 3 (aside from the Session Fallback) requires 3D hardware capability (according to GNOME, most 3D graphics cards manufactured after 2007 (or so) meet these requirements). However, the GNOME 3 desktop is different from the original or classic desktop most users are familiar with.
GNOME Session Fallback is automatically installed when you install GNOME Shell or GNOME. It is provided in the case that your graphics card does not meet the minimum 3D hardware requirements or drivers for your graphics cards do not support 3D hardware acceleration.
Who is it for?
GNOME Session Fallback is for those users that want a more or less traditional style desktop and don’t want to minimize the amount of extra files they install on their system.
While you can install GNOME Shell and GNOME, these will occupy more space on your hard drive. Installing them will not affect your systems performance except to where it comes down to free disk space.
In general, I think it is good practice to minimize the number of unneeded files on your system
What it looks like
There are two versions: GNOME Classic and GNOME Classic (No effects) – the difference between them is quite subtle.
The straight-out-of-the-box look of the desktop is:
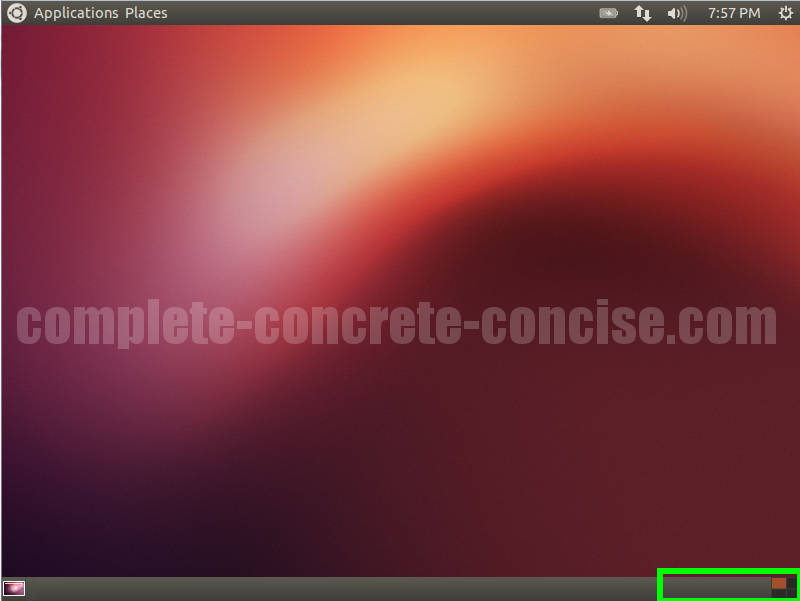
Gnome Classic displays the four desktops in the lower right corner as a small grid.
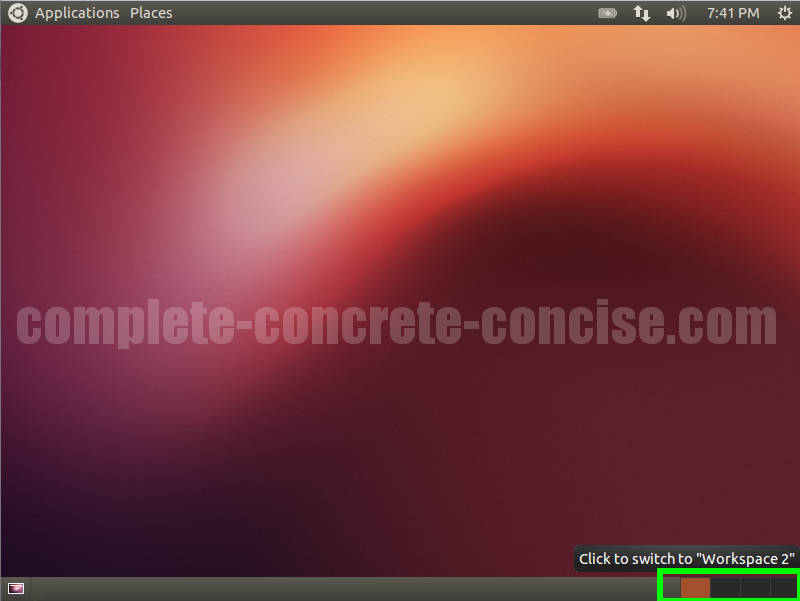
GNOME Classic (No effects) displays the four desktops in the lower right bar as individual panes.
Otherwise, I don’t see any other differences between them.
GNOME Session Fallback will install 35.5MB of files and data to your hard disk.
From the Command Line
If you are comfortable with Linux and know how to use the command line and apt-get then the command is:
sudo apt-get install gnome-session-fallbackDetailed instructions for accessing a command line can be found here.
Note: during installation, you are likely to get a message box asking which display amanger you use. It is safe to use either one.
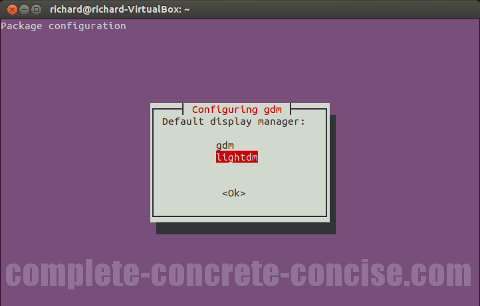
gdm is installed with gnome-fallback-session.
lightdm is the display manager shipped with Ubuntu.
Basically, the difference between the two is that your login screen will look different.
Afterward, you need to restart your system.
From the Ubuntu Software Center
Launching the Ubuntu Software Center
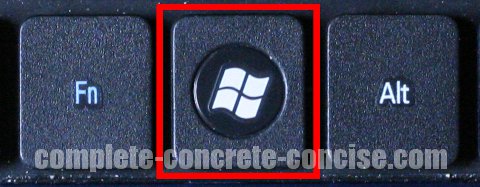
1) Tap the Windows (Super) key to bring up the Dash panel:
Note: tapping the Windows keys means pressing it as though you intend to type it. It does not mean holding down the key (holding down the key does something else).
Ubuntu calls this the Super key
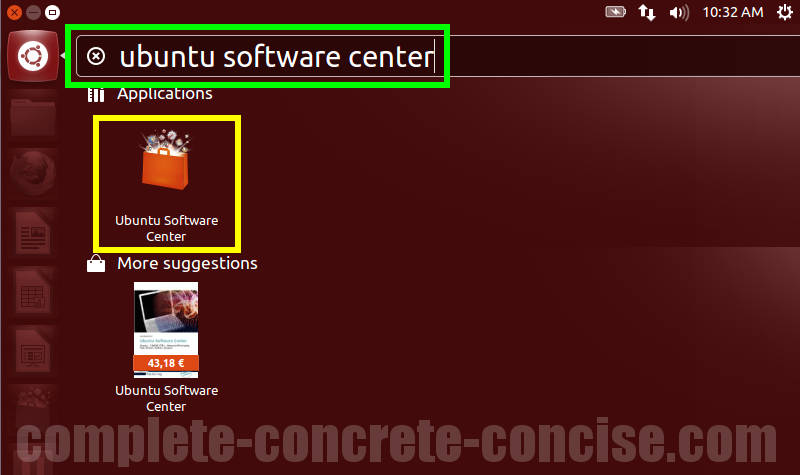
2) Type Ubuntu Software Center into the search field:
Note: as you type, search results will be displayed in the Dash Panel below.
You can stop typing when Ubuntu Software Center is the leftmost item in the panel.
3) Press the Enter key. This will select and launch the Ubuntu Software Center
Note: pressing the Enter key automatically selects the top, leftmost item in the Dash Panel. This is why it is not necessary to type everything.
Note: if, for some reason, you switch focus or change focus from the search field, then pressing Enter will not work and you will need to select the icon using your mouse (or navigate using your keyboard). This is definitely an issue Ubuntu needs to address with the Dash.
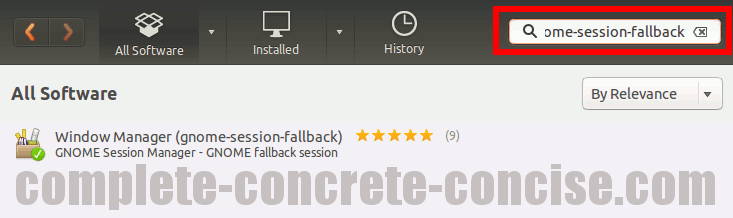
4) Type gnome-session-fallback into the Ubuntu Software Center search field. This will bring up related entries.
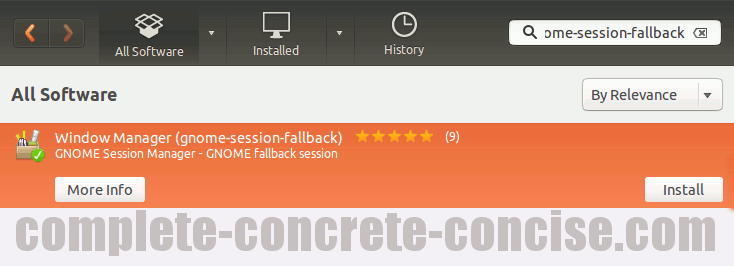
5) Click on the entry GNOME Session Manager – GNOME fallback session – this will highlight it in orange:
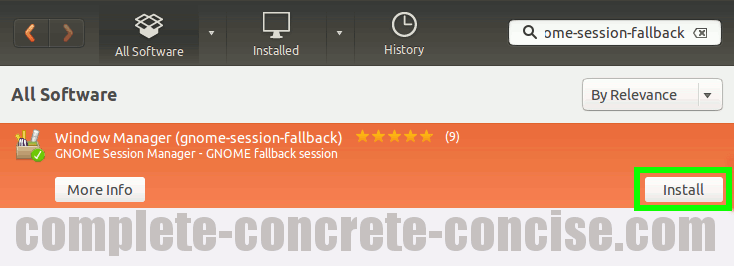
6) Click on Install:
If you receive the following error message:
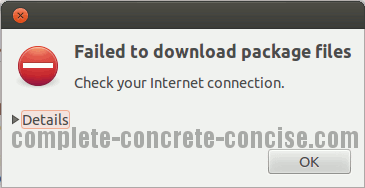
See this article for a possible solution.
Note: I haven’t encountered this error with Ubuntu 12.10, but I believe it is still possible.
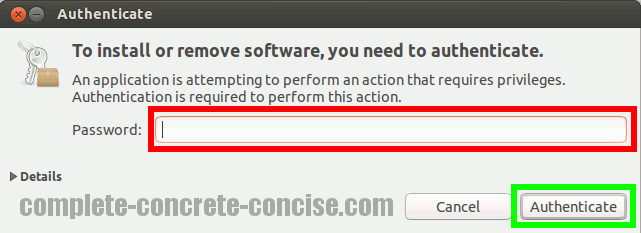
7) Enter your password and click Authenticate:
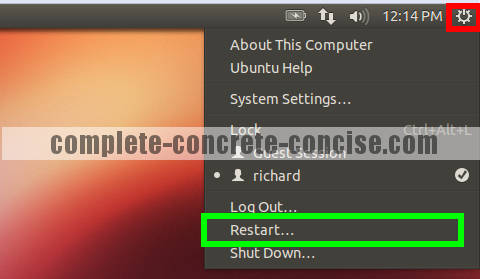
8) After installation is finished, click on the System icon in the upper right corner of the desktop and select Shut Down… from the drop down menu:
Note: it may be enough to just log out and log back in using the new desktop, but it doesn’t hurt to restart either.
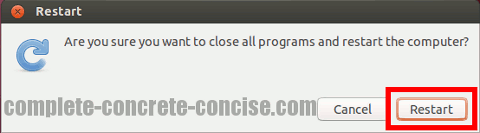
9) Click on Restart:
Selecting the Desktop
After the system has restarted, it is necessary to select the new desktop from the login screen.
It is only necessary to select the desktop the first time after installation. Ubuntu will remember your your selection for future logins.
You can even install multiple desktops and switch between them.
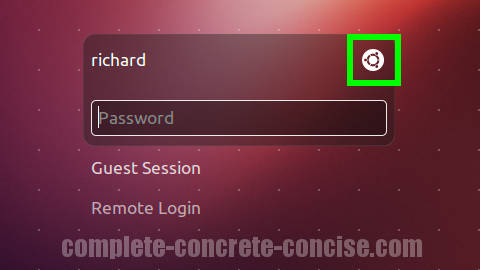
10) Click the icon in the top right of the Login box:
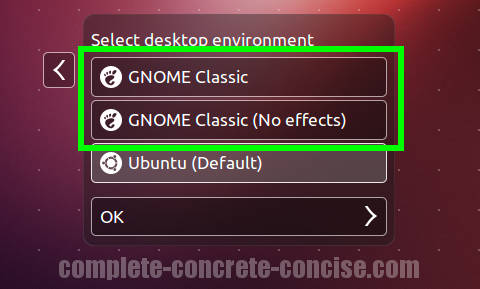
11) Select either GNOME Classic or GNOME Classic (No effects):
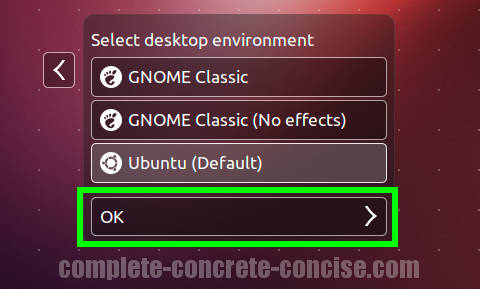
12) Click on OK:
13) Login as normal:
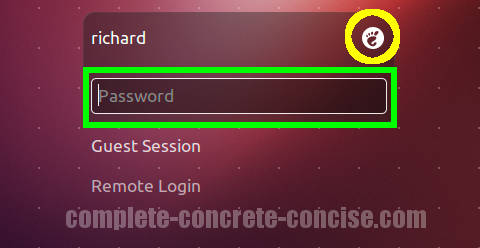
Notice the icon in the upper right hand corner has changed to a different icon. Some, not all, desktop environments will display an icon there.
This provides a quick way to know which desktop environment you are logging into.