These instructions are for installing AMPPS 1.2 on Windows XP with Service Pack 3. It should work for other configurations as well.
AMPPS is an extremely easy to install and use Apache Server which comes bundled with MySQL (a database), PHP (server side scripting language), Perl (another server side scripting language), Python (yet another scripting language) and auto-installation scripts for 225 different web applications.
Why would I want to install it?
To allow development and testing on your local machine instead of on a remote (and probably live) server. I use it to test out changes to my website before uploading and committing changes to the real site.
Compared to XAMPP, AMPPS is easier and friendlier to use because of its auto-installation scripts. This allows you to easily try out various web applications without having to (1) find them yourself, and (2) handle the low level install details (not that it is hard). If an application you want to try out does not have an auto-install script, you can still install it manually (as you would under XAMPP).
Since I am more interested in testing out applications than developing them, I like the convenience of having so many to choose from.
Why wouldn’t I want to install it?
AMPPS does not enable port 443. Secure URLs, which begin with https, connect to your browser using port 443. Regular URLs, which begin with http, connect to your browser using port 80.
There does not seem to be a simple way to enable it.
For most people, this is not likely to be an issue.
As well, AMPPS does not grant you MySQL root access. Again, for most people this doesn’t matter because AMPPS scripts handle database creation for you (if the application needs one). If you need to create a new database, you simply have to assign it a user to be able to use it.
Installation
Download the self extracting package, run it and, in most cases, accept the default settings.
Downloading
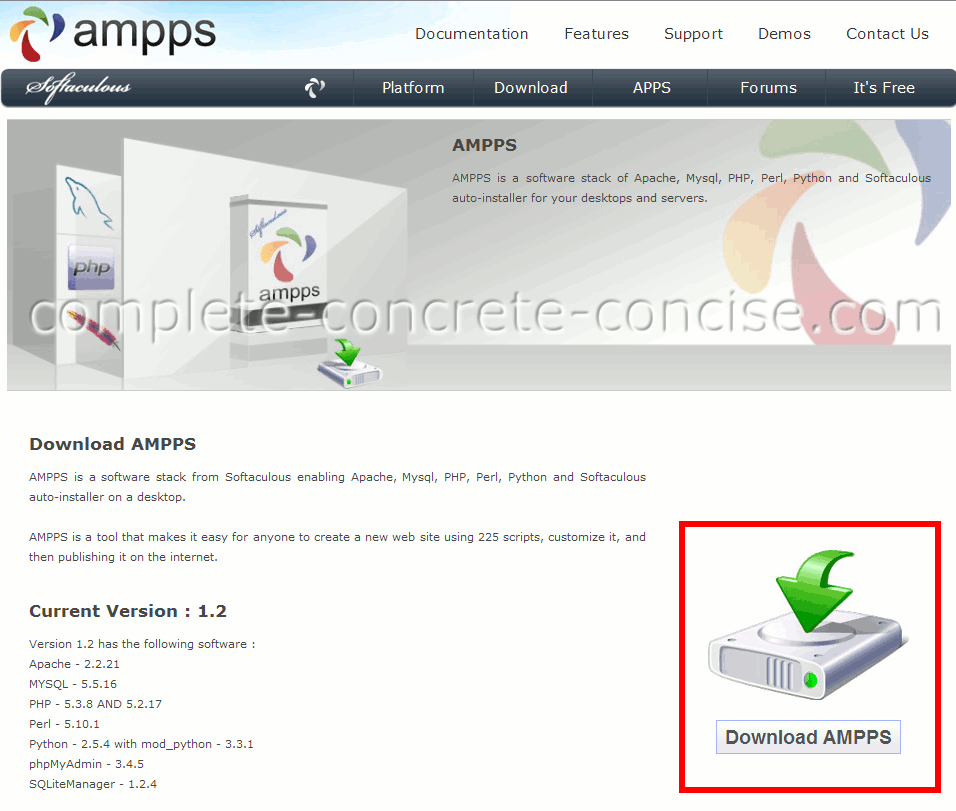
1) Go to the AMPPS download page and click on the download icon:
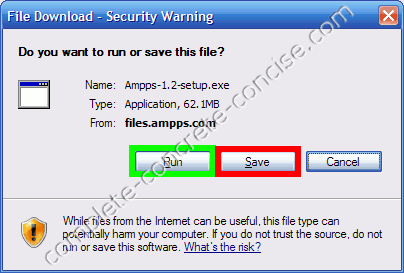
2) Select to either Save the file or to Run it directly over the Internet. Saving allows you to uninstall and reinstall if necessary:
Installation
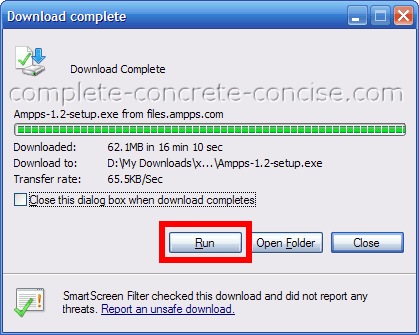
3) Click Run to begin installation. NOTE: this step may differ depending on (1) whether you chose to Save or Run the file in Step 2, (2) which browser you are using. I used Internet Explorer, FireFox downloads into its own location, (3) you already have the file and are just reinstalling.
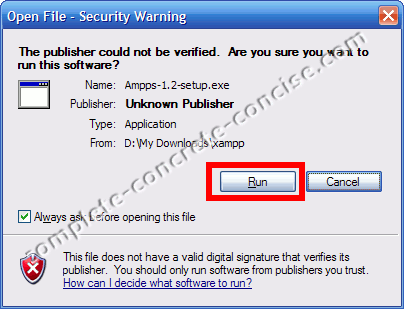
4) Windows may issue a Security Warning. It is safe to click on Run:
The installation process will present a number of screens (too many in my opinion). In general, it is ok to accept the default settings.
5) Click Next on the welcome screen.

6) Read the License Agreements and, if you agree, select “I accept the agreement” checkbox and click on Next to continue. Note: if you do not accept the agreements, then you will not be able to install AMPPS
:
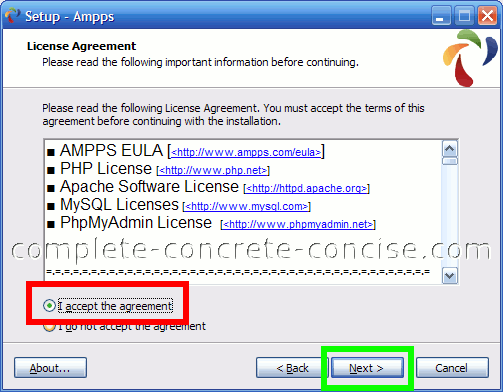
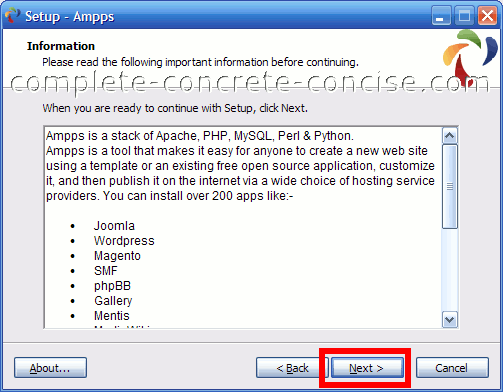
7) Click Next to continue.
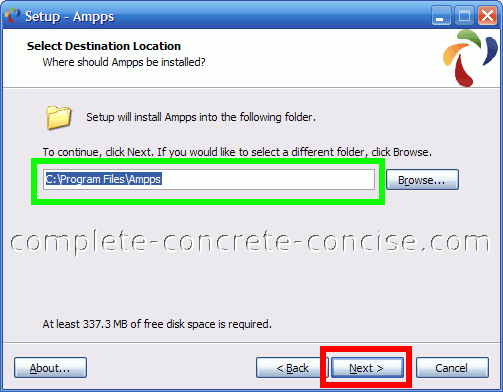
8) Choose where you want to install AMPPS. By default, it will be installed in C:\Program Files\Ampps. For most installs, the default selection is fine. I chose to install it in D:\ampps. You can either type the install location yourself, or browse for it:
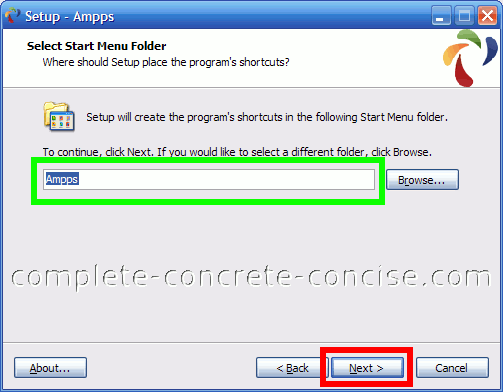
9) Click Next to create a menu folder called Ampps. If you like, you can change the name of the folder (by typing in a different folder name) or browse and select a folder to install AMPPS into. I accepted the default:
10) Click Next to allow creation of (1) Desktop Icon, (2) Quick Launch Icon, and (3) Start Menu Icon. If you do not want any or all of these icons created, then deselect them by clicking on the appropriate checkbox:

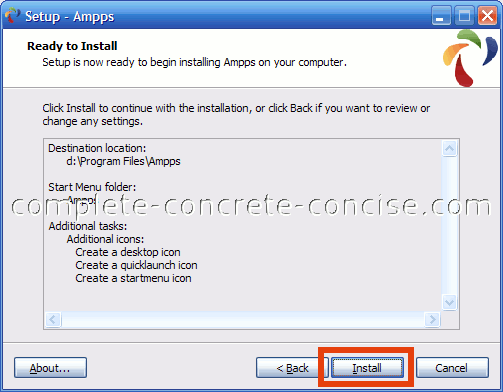
11) Review your installation options and click Next to continue installation. If you want to change any installation options, click Back to go to a previous screen. Since there were three different configuration option screens, you might have to click Back up to three times:
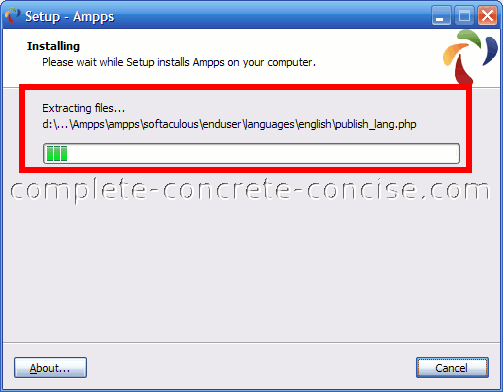
12) During installation, a progress screen will be displayed. Just wait:
13) After installation, click Finish to launch AMPPS:

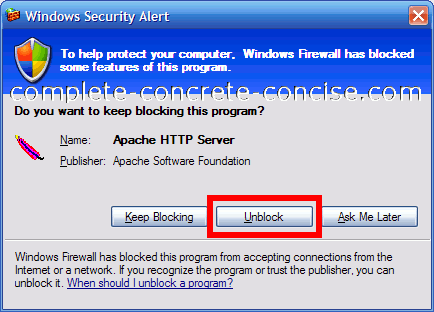
14) Windows may issue a Security Alert about running the Apache HTTP Server. Click Unblock to allow the Apache HTTP Server to run. NOTE: the Apache Server needs to run to in order for AMPPS to work:
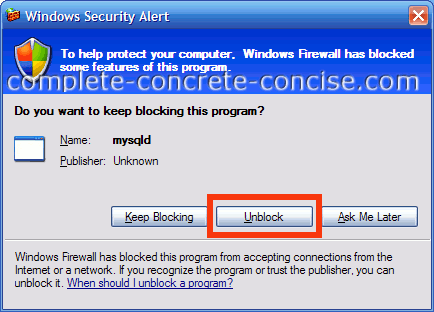
15) Windows may issue a Security Alert about running the MySQL Database. Click
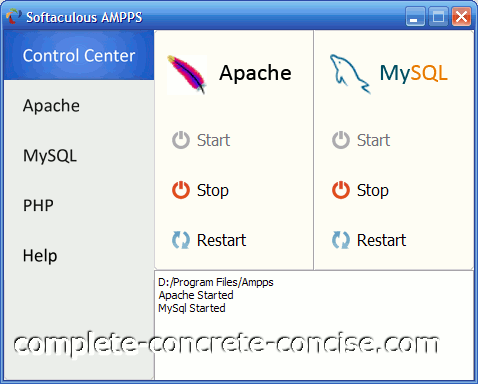
The AMPPS Control Panel
The AMPPS control panel is a little bit unintuitive – you know that the Apache server and MySQL Database are running because the Start icons are greyed out. It would be less confusing (I think) if they provided some sort of Running icon.
The Restart buttons are a nice touch and work well when restarting the services.
Running AMPPS
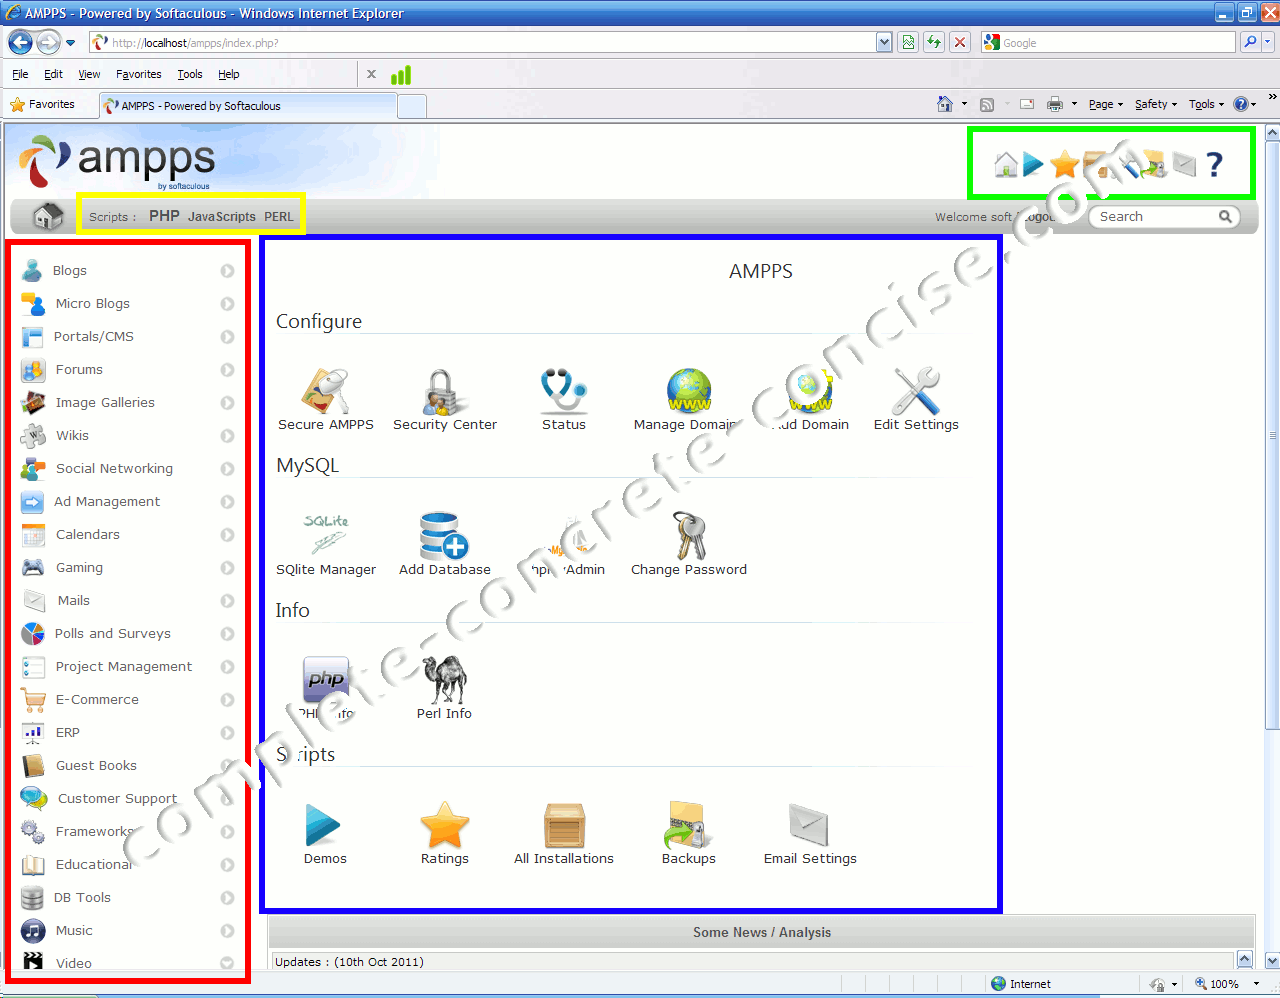
To run AMPPS, simply enter localhost/ampps into your browser’s URL field.
AMPPS presents you with a rich set of options for script installations: PHP, javascript, and Perl (ok, there is only one application under Perl – Movable Type)
You can choose various applications to install from the left hand side (boxed in RED).
There is a menu bar in the top right (boxed in GREEN).
In the center are presented various options and information (boxed in BLUE).
Near the top left, you can select which script packages you are interested in (boxed in YELLOW).
According to me by adding Softaculous to AMPPS they have made it the best amp stack ever.
It is definitely more user friendly for the casual user. The only downside is that if you need a secure socket connection (port 443) it is not available with AMPPS – but, for most users, this is not an issue.
the left hand side is disappear after install
I don’t understand what you mean by “the left hand side is disappear after install”.
I’ve installed both version 1.2 nd the newer 1.5. The control panel screen looks the same in both. I can’t see how the left hand side disappears because (to me) the control panel looks like a non-configurable dialog.