This tutorial describes how to install Joomla! version 2.5.0 under XAMPP version 1.7.3 on Windows 7.
The procedure should be the same or similar for other version combinations, but no guarantee is made.
Assumes you have already
- installed XAMPP. (Installation instructions can be found here.)
- created a MySQL database. (Creation instructions can be found here.)
Joomla! 2.5 is a release with long term support until at least July 2013.
Some images may be clicked on images for full size versions.
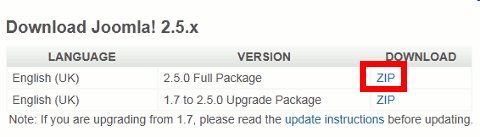
Downloading Joomla!
1) Download the full Joomla install from here Click on the zip link.
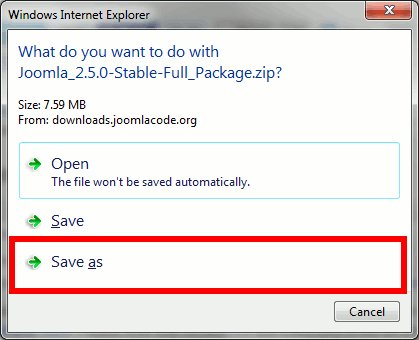
2) Click on Save as.
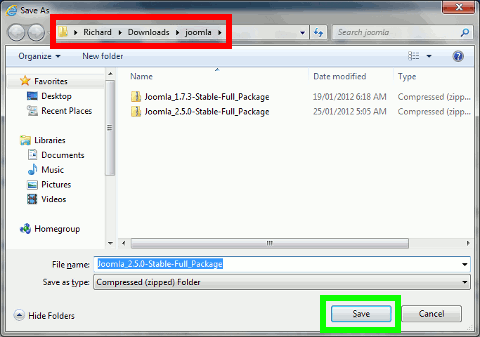
3) Choose a directory in which to save the file and click on Save. Remember where you saved the file.
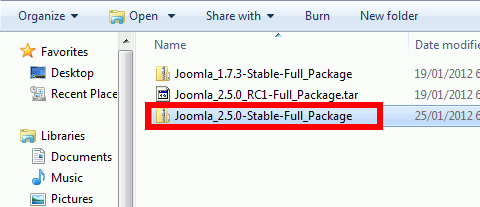
4) After the download has completed, you can choose Open to open the downloaded file with the default application or Open folder to open the folder where the file was downloaded (which is what the next step assumes):

Extracting Joomla!
NOTE: these steps assume Windows provides archiving functionality for you. If you have installed a different archiving program, the specific steps for extraction will be different
.
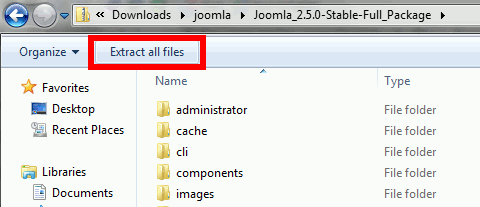
5) Go to the directory where the file was downloaded and open it by double-clicking on it:
6) Click on Extract all files:
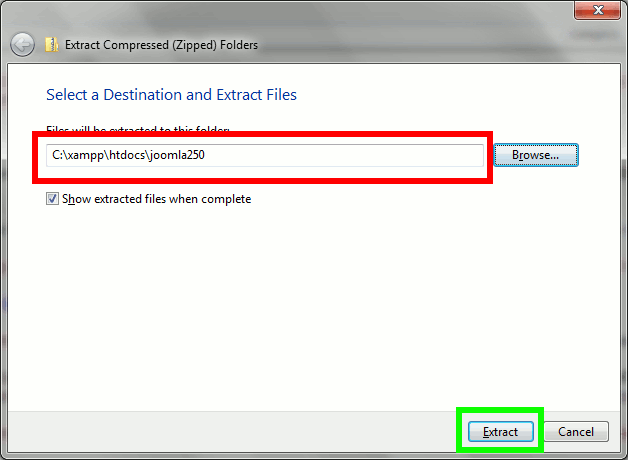
7) Extract the Joomla! files to a subfolder of htdocs in your XAMPP folder. By default, XAMPP would be installed to your C:\ drive, so you would enter C:\xampp\htdocs\joomla as the directory to extract to. In my case, I extracted them into a folder called joomla250. Click on Extract to extract the files.
Setting up Joomla!
8) Launch your browser and type http://localhost/joomla into the address bar. What follows http://localhost/ is the directory you installed Joomla! into (in my case, joomla250).

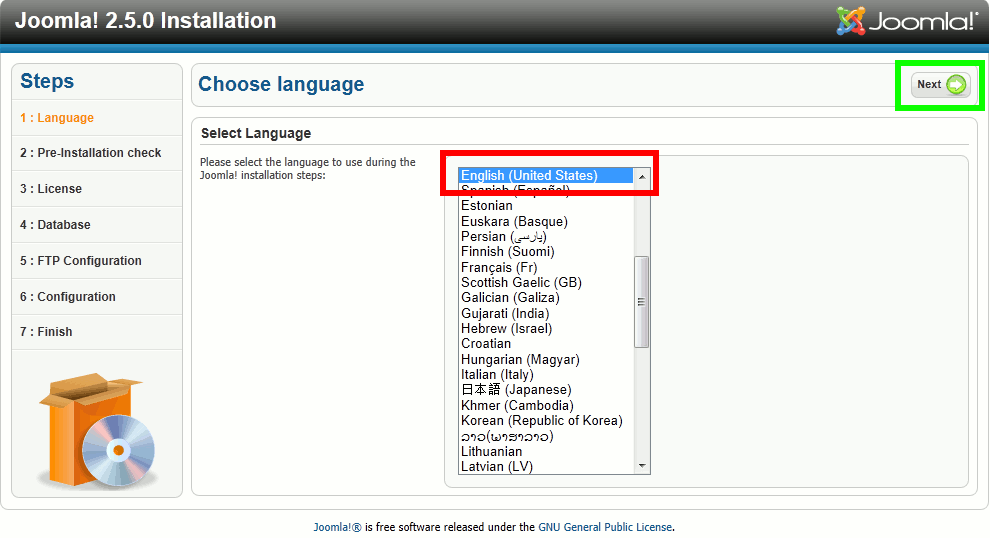
9) Select your preferred language, then click on Next. NOTE: I have only ever tried installing it in English.
10) Confirm you meet the minimum installation requirements, then click Next. It is normal for Display errors to be set to On. NOTE: If having Display errors set to On is really bothering you, you can turn it off by following these directions.

11) Read the GNU license and, if you agree with it, click Next.

12) Fill in the database configuration information:
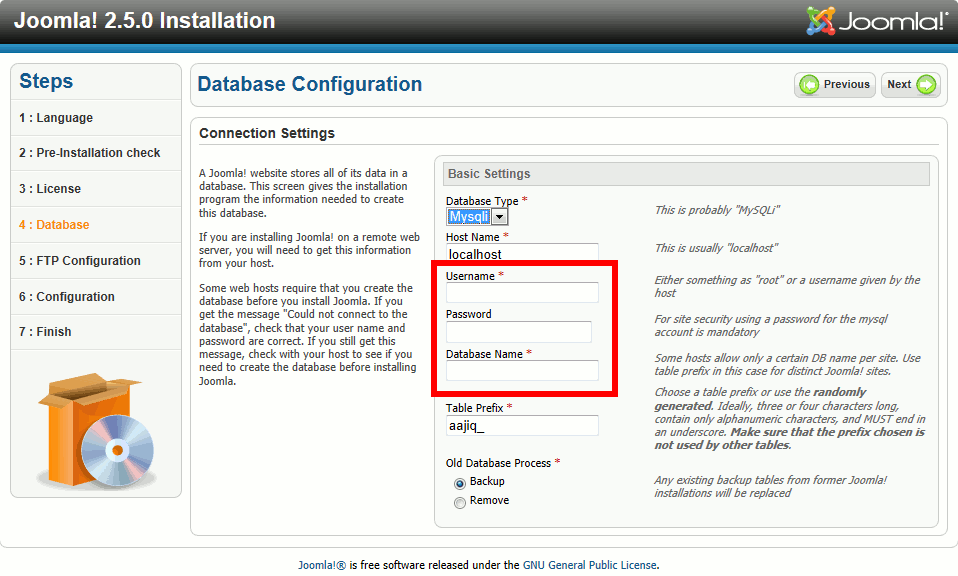
- Database Type: Mysqli (default setting) NOTE: Mysqli is the improved MySQL interface available for use with MySQL 5.0 or higher. You can still use the Mysql interface if you like.
- Host Name: localhost (default setting)
- Username: if you created a MySql User, enter the name here. Otherwise, use root.
- Password: this is the password associated with the user name entered above. If you used root as your username, then leave the password blank (the default XAMPP install does not assign a password to root).
- Database Name: this is the name of the database you created. Database creation instructions are here.
- Table Prefix: a unique prefix for accessing the table. Using the default (or suggested prefix) is fine.
13) Ensure FTP is set to No, then click Next.

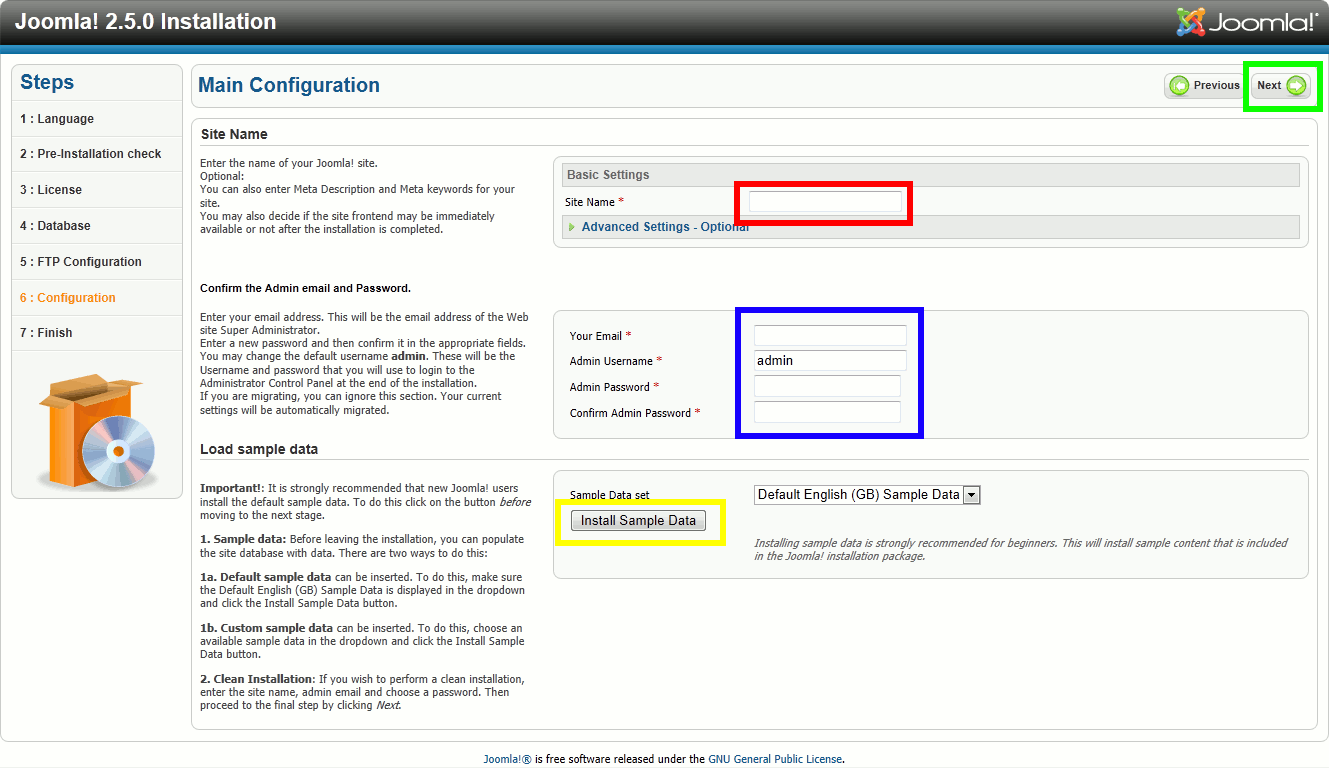
14) Enter a site name (for example, Complete, Concrete, Concise or whatever name you want this site to have).
Enter Your Email address. Joomla! will send notifications to this email address.
Enter an Admin Username. This is the username you will use to log into the Joomla! backend. By default, it is admin (and I leave it as admin). NOTE: if this is a production install, or you are worried about security, then you should choose a better admin name – it should be longer and include letters, numbers and symbols / punctuation. For example, the following admin name worked: -admin.123@sqig.
Enter an Admin Password – this is the password you will use to log into the Joomla! backend.
Confirm the Admin Password.
Choose if you want to install the sample data. I like to install it, since it saves me the trouble of populating the site with sample articles for testing. The sample data is only available in English. NOTE: don’t install the sample data if you are installing the site for “real” use because it is a pain to have to go and clean up all the sample data.
Click on Next.
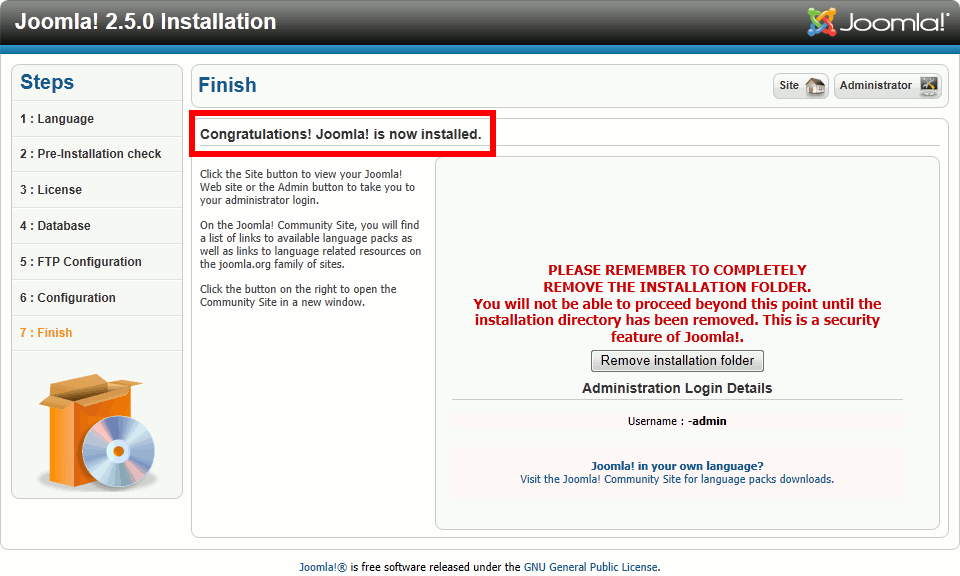
15) Confirm you have successfully installed. Note that your user name for logging into the Joomla! backend is admin (if you accepted the default name, otherwise it is whatever name you entered into the Admin Username field in Step (14)).
Cleaning Up
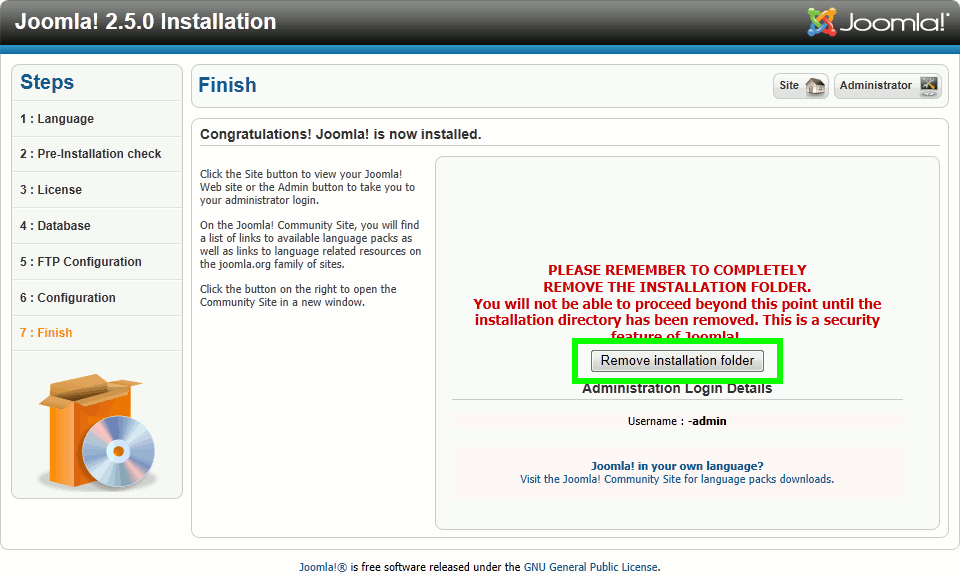
As a security precaution, Joomla! requires you to remove the installation directory before the site becomes functional. In Joomla! 2.5, this can be done from the final installation screen.
16) Click on the Remove installation folder to remove the installation folder and complete the installation.
You should now be able to access your Joomla! site by entering http://localhost/joomla into your web browser’s navigation bar.
To access the backend, you would enter http://localhost/joomla/administrator into your web browser’s navigation bar.
NOTE: what follows localhost is the name of the folder you installed Joomla! into (see Step 7 above).
If you want to access the installed site using a “real” web address (like www.joomla.25) instead of localhost/path-name, you can find instructions to do that here.
Very good tutorial. In my case however I switched from using XAMPP to Uniform Server (http://www.uniformserver.com/) – it is smaller, less files what is good when doing backups of that folder.
I’ve never heard of uniform server, but I will check it out.
For dead easy apache server install and tons of package install scripts, I would recommend installing AMPPS. My tutorial on installing it is here.
The only thing AMPPS lacks (or at least did in version 1.2, I haven’t tried version 1.5 yet) is a secure socket (port 443).
The guy who wrote this tutorial is a genius because its very simple and clear to follow. Thanx though
Thanks for the praise.
Hello! I’m using XAMPP 1.7.7, my installation freezes when I am at step 12. I click next, and nothing happens. Any Ideas?
Cheers!
From your description, it sounds like there is a mismatch between the username and password. The default username should be root and the default password left blank. It might also be a problem with the database name.
Unfortunately, I am unable to test this because I MySQL in XAMPP 1.7.7 does not run properly on Windows 7 (my machine) – although it is fine with 1.7.3 and 1.7.4.
I still recommend using XAMPP 1.7.3 instead of 1.7.7 or 1.7.4.
You can find instructions for downloading XAMPP 1.7.3 over here.
Well! It seems that Joomla creates the tables (More speciffically between 38 and 51) but, at some time, mysql or joomla or something else hangs. I don’t know why. That doesn’t happens to me when I use Joomla 1.7
Sorry for my english, I’m spanish speaker.
Your English is fine (better than my Spanish).
Try installing XAMPP 1.7.3. I have had problems with XAMPP 1.7.4 and XAMPP 1.7.7 (I can’t get 1.7.7 to run properly on my Windows 7 computer).
Hi!
Your blog is amazing! I`m a beginner but I understood everything you wrote! Thank you so much! Can you, please, write about installing a Joomla template theme? I really want to learn how to do that!
Following your instructions I installed XAMPP, Joomla 2.5 and everything works fantastic!
Sorry for my english because it is not my native language. I am from Belgrade, Serbia! 🙂
Thanks for your praise.
Sure, I’ll write up an article on installing a Joomla! theme.
Zlib Compression Support No
Database Support:
() No
Directive Recommended Actual
Safe Mode Off Off
Display Errors Off Off
File Uploads On On
Magic Quotes Runtime Off Off
Magic Quotes GPC Off On
Register Globals Off Off
Output Buffering Off On
Session Auto Start Off Off
Native ZIP support On Off
any ideas on what I need to do to get past Step 2. see above
My best guess would be that the MySQL service is not running – although, I am surprised that Display Errors is set t off since the default setting for a XAMPP install is on.
Very clearly explained! This is what an ideal web tutorial should be like! Thank you admin!
Thank you for the praise and you are very welcome.
Thanks for your detailed explanation in this post and your MySql article- saved me alot time as I try to launch my first site.
You’re welcome and thanks for the feedback. I definitely remember getting ready to launch my first site (on Joomla! as well).
Since then I have moved to WordPress. The two main reasons were: (1) built in commenting ability (an extra module in Joomla!) and (2) ability to post an article in multiple categories. Depending on the type of site, neither of those requirements may be important.
You might also want to look into installing a Moveable Type XMLRPC component in Joomla! This will allow you to use a 3rd party blogging tool (like Windows Live Writer or ScribeFire) to edit and manage posts. Believe me, editting posts in the back end gets old very quick.
I want to TRULY thank you for the CCC Joomla installation directions. I’ve tried many of video tutorials and only you delivered it with CCC steps.
Thank you for the enthusiastic feedback and you are welcome.
Hello,
When trying to install Joomla! 2.5.4 on my server, I can see ”Native ZIP support” OFF. Is that a problem?
Thank you.
They are already up to version 2.5.4? I guess I am going to have to check if my instructions are still valid.
As for your question, it is fine if Native ZIP support is OFF.
This can happen because (1) your web host provider doesn’t enable it or (2) you have disabled it in XAMPP.
If you are running XAMPP on a Windows machine, you can check the php.ini has the following line:
extension=php_zip.dllmake sure there is no semicolon (;) in front of it.
If Native ZIP supported is not available, Joomla! can povide it itself (though, I am told it is much slower).
One of the techniques websites use to reduce the amount of traffic is to ZIP (compress) the page going out. This requires a little more server time (to compress the web page) and a little more client / browser time (to decompress the page), but it reduces the transfer time. This was more significant when most people were on a dial up connection. With broadband connections this is much less of an issue.
BTW, page compression would only happen if (1) you enabled it in Joomla! and (2) the web browser supported it.
Thank you, admin for your complete-concrete-concise answer!
Yes, Joomla! reached 2.5.4 version.
Off topic: Did you tried K2 (component?)? I could not find any post here about it.
Indeed, WordPress is more suitable for this blog than Joomla! I am using WordPress on my blog too.
Thanks for replying back.
You are the second person to ask about th K2 component. No, I have not tried it, but if it is a popular one, then I suppose I may give it a try.
Thanks again for your comments.
Update 16-April-2012 @ 03:11
Ok, I downloaded K2, installed it and played around with it. My first problem is that I was unable to get K2 to be the default front end. Probably, I am missing some configuration (I did enable all the k2 components in the backend and created a menu entry for K2, but, clearly, I am missing something – and nothing obviously pops out on the K2 website in the way of help).
The second issue I have with it is that I can’t assign articles to multiple categories (the reason I moved from Joomla! to WordPress). I can simulate it by using tags, but … that’s not really wha tI want to do.
On the plus side, it does come with a comment module built in. This is a definite advantage. I did not play with it, so I don’t know if they also insist on using BBCode for formatting text. On an aside, I think using BBCode (as most Joomla! comment modules do) is silly. Most people don’t know BBCode, but they do know the basic HTML codes like <b> (even if it is obsolete) or <a href=”some URL”>.
My initial look at K2 does not make me want to look any further at it.
I have change the port as 8080 instead of 80 (default). So in the 4th step. How should I give the HOST NAME?
‘localhost’ is not working
‘localhost:8080’ is making the installation waiting.
When you change the port number, you have to suffix the number to the end of the URL.
Normally, you would expect localhost:8080 to work.
Unfortunately, this does not work with all browsers – most notably Internet Explorer.
Try using the full URL:
http://localhost:8080This is not a bug with those browsers. Strictly speaking, you must always enter a complete and valid URL. Omitting
http://from the URL is (strictly speaking) invalid, but … many browsers allow it as a convenience – if you enter an invalid URL, they try to be helpful and “fix” the URL for you.The most common transfer protocols are http, ftp and their secure versions https and sftp. Strictly speaking, you always have to prefix your URL with the transfer protocol.
Thank you for the best tutorial I have had the Pleasure to use.
Follow the steps and everything works, First Time!
I have been trying to get joomla in localhost for a year now without success until today.
If I could have your tutorials earlier today I would have used xampp 1.7.3, instead I have used 1.7.7 with Vista, honestly I don’t know I got it to work but I am not changing now 🙂
Thank you.
Thank you very much for the feedback and I’m glad it all worked for you.
Thanks for this easy and straight forwards tutorial.
Great job!!
THank you for the feedback and you are welcome.
Sir, My joomla installtion stucks in step one, that is the language selection in version 2.5.4. I tried lower version ie 1.5.25,here the installation process got hanged in step-4. I mean surprisingly the next button doesn’t work, Sir please help, I am dillema. From the last three days i am looking for the solution. I am a newbie. I am using XAMPP server 1.7.7 one. I tried in easyPHP too,here also the next button in dead.
I am using Windows XP.
You mean Step (9) in my instructions. Step (1) is downloading Joomla!.
Which language are you trying to select? I only ever use English, but if you tell me the language you are trying to use, I will try installing using that language as well.
The latest version of Joomla! is 2.5.5.
[Updated 19-June-2012 @ 08:03]
Personally, I would recommend WordPress to someone new to CMS software (I started out with Joomla! but eventually got frustrated with it and have been moving my sites to WordPress).
You can read my reasons here.
I have a turorial for installing WordPress here.
WordPress is avilable in multiple languages, but you have to manually install the languages.
WordPress is available in these languages.
A WordPress turorial for installing a language is here.
NOTE: I have never tried installing a different language for WordPress