This is a basic tutorial for the Unity Interface / Desktop which comes with Ubuntu 12.04 – it should help get you up and running.
There are differences between Unity shipped with Ubuntu 11.10 and Ubuntu 12.04.
This tutorial reflects the way I understand and use the Unity interface.
The Unity interface consists of four main parts:
- Panel
- Launcher
- Dash
- HUD
The Panel
The Panel is the strip at the top of the interface:
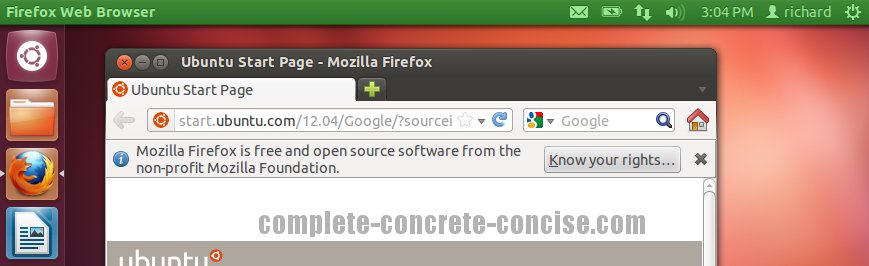
The menu bar that you are used to seeing near the top of an application’s window is now displayed in the panel:

There is a catch:
- The menus displayed in the Panel are only for the active (topmost) application window.
- The menus are only displayed when you hover your mouse over the Panel, otherwise, the Panel is empty.
- If a window is maximized (full screen), the buttons (icons) for minimize, maximize, and close are hidden – unless you hover your mouse over the panel.
This might seem like a step backward. Why hide the menu bar? Why make the user have to move the mouse all the way to the panel to access it? While it gives a little extra window space to the application, it is also inefficient – and this was the problem with Unity in Ubuntu 11.10.
In Ubuntu 12.04, Canonical has added the HUD. The HUD makes mousing / navigating through menus obsolete.
The Launcher
Despite being the most prominent feature of the Unity interface, it is the one I use the least.
This is the panel of buttons on the left hand side of the screen:
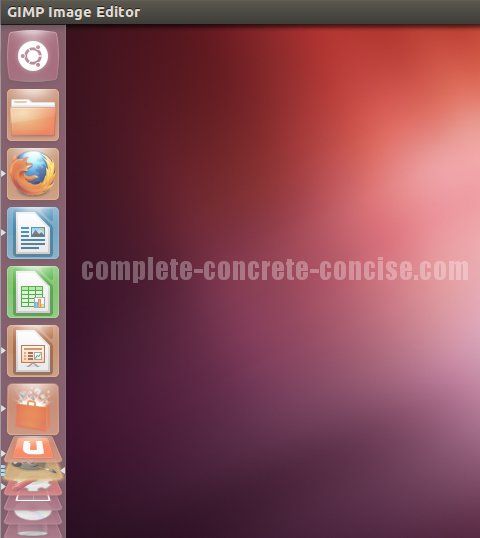
It serves 3 functions:
- Application Launcher: clicking on an icon will launch the application associated with that icon. e.g. Clicking on the FireFox icon launches the FireFox browser.
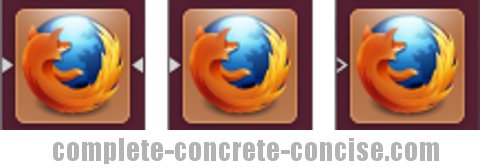
- Visual indicator of running applications: any running application has its icon placed in the Launcher and an indicator showing its status.
- Two solid triangles: this is the active application (the one on top).
- Single solid triangle: the application is running, but does not have focus (is not on top).
- Single open triangle: the application is running in a different workspace (by default, Ubuntu 12.04 sets up 4 workspaces).
- Application Switcher: you can switch to an application (bring it to the front) by clicking on its icon in the Launcher.

You can add or remove applications from the launcher. In general, only the most common applications should be in the launcher.
Dash
The Dash replaces searching through menu hierarchies for applications.
Like anything new, it feels all wrong, but, I found it very easy to pick up and now prefer it over the traditional menu navigating paradigm.
Instead or navigating a hierarchy of menus, Dash provides a query field in which you type the name of the application or document you want to open.
Using the Dash interface is very much like searching with Google – as you type in what you are looking for, Dash displays possible answers.
I think the greatest strength of Dash is that you can navigate it completely via the keyboard, so you never alternate between typing and reaching for the mouse.
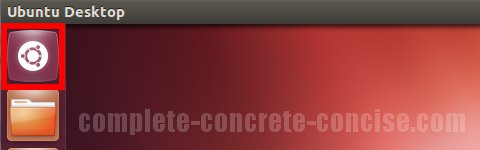
Dash is activated by either:
1) Clicking on the Dash icon in the Launcher:
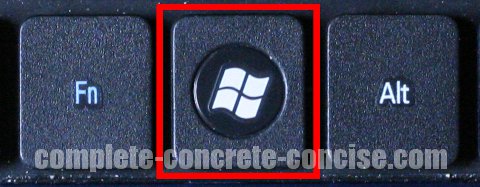
2) Tapping the Windows key on your keyboard
Note: tapping the Windows keys means pressing it as though you intend to type it. It does not mean holding down the key (holding down the key does something else).
Ubuntu calls this the Super key
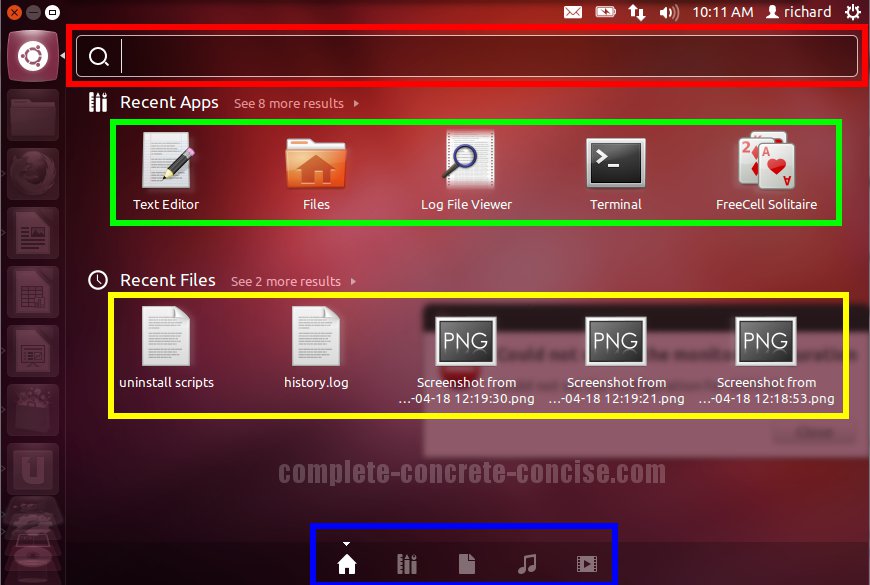
The Dash panel looks something like this (click for a larger image):
-
The query field (outlined in red) is where the keyboard focus goes when you activate the Dash.
Type the name of the application you want to run, or document you want to open. As you type, Dash will update the list of applications and documents.
It is not perfect, if you type in
gameyou will get gbrainy, AisleRiot Solitaire and Freecell Solitaire, but not Sudoku (Sudoku is found by typingpuzzleorsudoku).I hope that as the Dash is developed, it improves at finding related applications. Despite this limitation, it works really well.
-
A list of the most recently used applications (outlined in green) is displayed below the query field. If you type in the query field, the list of applications is modified to match your search.
You can use your mouse to select an application, or you can use the arrow keys to navigate to the desired application (and then press
Enter. I like using the arrow keys because my hands don’t have to leave the keyboard. -
A list of the most recent viewed documents (outlined in yellow) is displayed below the recently used applications. If you type in the query field, the list of documents is modified to match your search.
You can use your mouse or the arrow keys to navigate and select the desired document. I like using the arrow keys because my hands don’t have to leave the keyboard.
-
At the very bottom of the Dash (outlined in blue) are a number of icons. These are “lenses”. A lens is a specifically focussed (or themed) query. The five lenses at the bottom are:
- Dash lens: this is the default lens.
- Applications lens: this focuses searches only within applications.
- Folders and Documents lens: this focuses searches only on folders and documents.
- Music lens: focuses search on music.
- Video lens: focuses search on videos.
You can navigate to the lenses using either the mouse or keyboard.
If you hold the Windows (Super) key down for a few seconds, a cheat sheet of commands will be displayed (click for larger image):
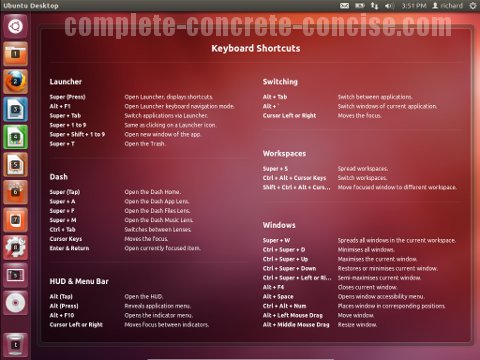
Note: the cheat sheet only appears if you are running the Unity interface (not the Unity 2D interface) and your screen resolution is 1024×768 or greater.
This cheat sheet is not available in Ubuntu 11.10.
While the Unity and Unity 2D interface are very similar, some small differences can be seen in this comparison image:
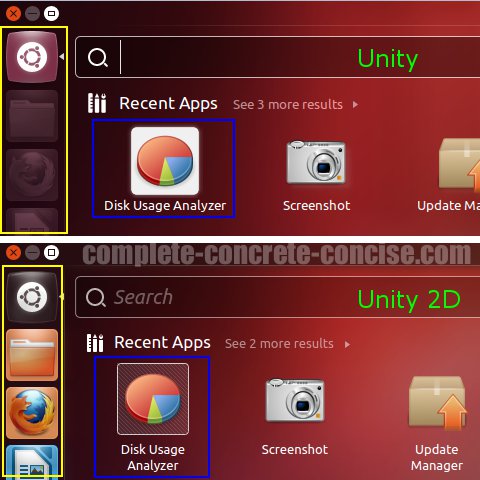
The most obvious difference is that the Launcher icons are greyed out in Unity, but not in Unity 2D.
HUD
The HUD is new with Ubuntu 12.04 and combined with Dash it provides a powerful way of interacting with your applications.
Just as Dash replaces navigating a hierarchy of menus to find applications and documents, HUD replaces navigating a hierarchy of menus in an application.
Like anything new, it feels all wrong, but, I found it very easy to pick up and now prefer it over the traditional menu navigating paradigm.
Instead or navigating a hierarchy of menus, HUD provides a query field in which you type the name of the action you want to perform with your applications.
Normally, to do something in a program you either use a keyboard shortcut (like
Ctrl+Bto bold text in a word processor), or you use the mouse to select an option from a menu or toolbar.With HUD, you type in what you want to do. The HUD interface will then locate appropriate / matching menu entries and display them to you to select. Again, you can use the mouse to perform the selection or the arrow keys and the Enter key.
I think the greatest strength of HUD is that you can navigate it completely via the keyboard, so you never alternate between typing and reaching for the mouse.
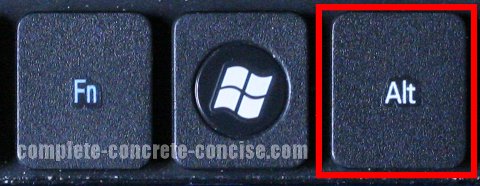
The HUD is activated when you tap on the Alt key:
Note: tapping the Alt keys means pressing it as though you intend to type it. It does not mean holding down the key.
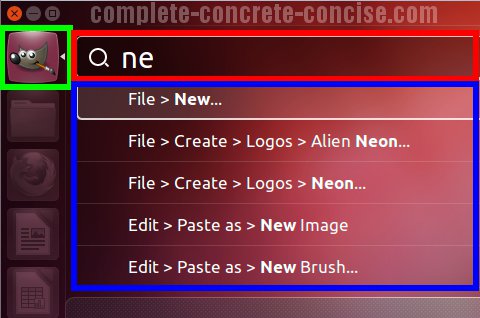
The HUD panel looks something like this:
-
The query field (outlined in red) is where you type the operation you want to perform in the application, e.g.
open,new,auto white balance, etc.This is where the focus goes when you activate the HUD.
As you type, a list of possible commands will be displayed below it. You can navigate those commands using the mouse and clicking to select or the keyboard (arrow keys) and pressing Enter to select. By default, the top command is always selected and will be executed if you press Enter. A nice thing is that you do not have to type the whole command.
Note: if a command is not available (for example, it is greyed out), then it will not appear in the list of commands.
For example, if you have just opened GIMP without any image, it is not possible to perform image operations on it (like unsharp mask, or auto color enhance, etc). So if you type
unsharpinto the query field, you will not receive any options.I think it would be better if the HUD somehow indicated that the operation is unavailable rather than just not showing it at all.
-
On the left, the icon (outlined in green) shows you for which application the command is for.
The HUD may display commands for other programs (like email). This icon shows you which application the command is for.
-
Below the query field is a list of matching commands (outlined in blue.
Note: HUD does not work with all applications. I like it a lot and think it is a significant advance in UI technology, but it’s failure to work with some significant applications (like LibreOffice) is going to hamper adoption of this interface.
This is a problem with the way LibreOffice has implemented its menus, not with the way HUD accesses those menus.
To date, LibreOffice is the only app I’ve encountered that doesn’t work with the HUD interface.
Final Words
Unity is a new way of interacting with the computer: instead of navigating a hierarchy of menus, you type what you want to do.
As an old timer (my first interactions with a computer were via a teletype), I never really liked the mouse / GUI way of doing things because it required me to take one hand off the keyboard. As a consequence, I have always configured shortcut keys to perform common tasks.
With Unity, I am able to keep my hands on the keyboard and easily perform the tasks I need. I still program my shortcut keys, but I know longer have to navigate through menus to find some lesser used operation.
Play with it. I think you will find it easy to learn. Certainly, I have found it easier to adapt to than the Ribbon interface Microsoft introduced a few years ago.
Additional Resources
While these aren’t tutorials, they offer some insight into Canonical’s focus and direction (they are written by Mark Shuttleworth – Canonical’s CEO):
Introducing the HUD. Say hello to the future of the menu.
Dash takes shape for 11.10 Unity (note: the Dash panel has changed somewhat from the screen capture he presents)
This shows a side by side comparison between using the tradition menu driven way to perform a task and using HUD. While a number of commenters have complained that it isn’t an objective comparison, I think it shows very nicely the difference in working in both environments:
This is another video showing the HUD In action:


Thank you very much for taking the time to create this very helpful tutorial for someone new to Ubuntu and Unity.
Thank you for the feedback.
There will be a more advance tutorial coming. Once you get the basics, then there are a number of tricks to help you move along a lot faster.
For example: in Dash, when you type the name of an application, (1) you do not have to type the whole name – just enough so it is the first option, (2) you do not have to navigate to the first application (either with keyboard or mouse) to launch it, you just need to hit the Enter key and it will launch.
For example, I frequently use the basic editor gedit. I access it by typing ed into Dash and then hitting Enter and it launches.
I’m with everyone else, Thank You for this excellent tutorial, achumm I mean article on using Unity. I too was mad with frustration at it and have a better understanding now. I agree with you in that the idea of not having to move your hands away from the keyboard for common task’s is awesome and the “Super” key is great. Now watch MS call their next OS Unity or something:) Then it will be “Super Windows” gag. Anyway, I love Unity and now if we could only fix all those wonderful bugs out there in 12.04, life would be much easier to deal with. I see a lot of new users frustrated with Ubuntu 12.04 due to issues and wish they could backport Unity features in 12.04 to 11.10 stable AND offer that as a default on the Website for downloads. I sent a friend there to try it (not too saavy computerwise) and he had issue after issue and isn’t 12.04 still for those on the bleeding edge? I know a bit off topic but I’m going to now send him back to 12.04 and include this page for him.. I’m sure it will help ALOT..
Thanks Again Canonical!
While I’ve experienced some crashed with 12.04, I am never sure if it is the core system itself or all the software I keep installing / uninstalling as I try things out.
Certainly it is more stable than the first alpha versions which would just crash on their own – even when I was doing nothing.
I am not sure which branch Canonical is taking their source from, and how much putting Unity over GNOME is affecting stability.
Hopefully it will stabilize quite quickly – Ubuntu 11.10 has some serious issues when first released, but Canonical quickly fixed many of them.
After days of frustration not wanting to leave Ubuntu 10.04 (why? 10.04 is perfect) – it was the bit which said “..give Unity a try..” so I read this post.
Excellent.
All the stuff one can never seem to find easily.
Why doesn’t canonical ship this stuff on the front page.
Very many thanks for an excellent starter … in particular the concept of using key strokes and finding ‘Super’ which I never knew about.
many thanks. such relief.
You’re very welcome.
I ask myself the very same question about Canonical – they are just shooting themselves in the foot by forcing Unity without even the slightest explanation.
I think they should have had a little tutorial script that popped up little messages to help you get to know Unity. I know KDE does a bit of this for their Plasma interface.
Thanks for the feedback.
I just wanted to add my 2 cents. I concur with the last two posts and want to thank you for this tutorial. I have been looking for something like this for years!! Great Work!!! And I look forward to additional tutorials.
Thank you for the positive feedback. I am always open to suggestions for new topics.
how to install ubuntu with windows xp or 7
The way I do it is to run VirtualBox on Windows and then install Ubuntu as a virtual machine. As long as you install the Guest Additions and enable 3D graphics, everything works reasonably well – a bit more sluggish than on real hardware, but not too much so.
If you are running Windows 7, I can also recommend using Ubuntu 12.04 with the Wubi installer. Unfortunately, I have had bad luck running Wubi on Windows XP.
Finally, you can dual boot your machine. The first thing you would need to do is repartition your hard disk so you have a place to install Ubuntu. I might write an article on this. I do run Ubuntu 13.04 this way. The only thing I don’t like about it is that it installs GRUB as the boot manager and … well, Grub is an ugly looking boot manager.
Thanks for your question.