For instructions on installing Joomla 1.6.x under XAMPP 1.7.3, please see here.
This tutorial describes how to install Joomla! versions 1.5.15 through 1.5.23 (skip 1.5.19 because it is broken) under XAMPP version 1.7.3 on Windows XP.
XAMPP 1.7.4: Installing Joomla 1.5.22 or 1.5.23 under XAMPP 1.7.4 will FAIL. I haven’t tested all Joomla! 1.5.x versions under XAMPP 1.7.4, but it is a good bet they will all fail too.
XAMPP 1.7.7: Installing Joomla 1.5.23 under XAMPP 1.7.7 will SUCCEED, but there are the following problems:
- Installing Sample Data will FAIL
- XAMPP 1.7.7 has strict checking for PHP, this will cause Joomla! 1.5.x to cause it to display many, many errors – effectively making the site unusable.
For that reason, I still recommend Joomla! 1.5.x be installed with XAMPP 1.7.3
The procedure should be the same for other version combinations, but no guarantee is made.
Assumes you have already
- installed XAMPP. (Installation instructions can be found here.)
- created a MySQL database. (Creation instructions can be found here.)
NOTE: Joomla! 1.5 will continue to be supported until April 2012.
Click on images for full size versions.
Downloading Joomla!
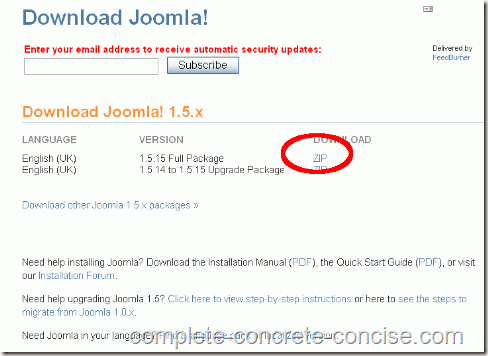
1) Download the full Joomla from here.
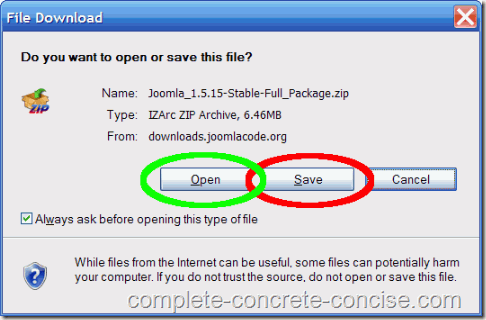
2) Choose to either save the ZIP file or to open it over the web. Saving the ZIP file makes it easier to install Joomla again, if you have to.
Extracting Joomla!
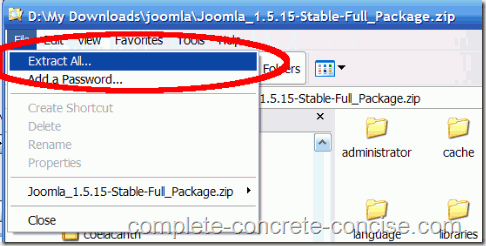
3) Open the downloaded file by double-clicking on it. From the File menu, select Extract All. NOTE: this step assumes Windows provides archiving functionality for you. If you have installed a different archiving programming, the specific steps for extraction will be different.
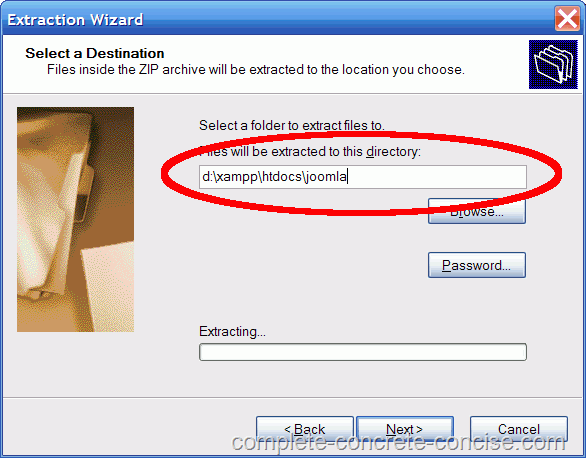
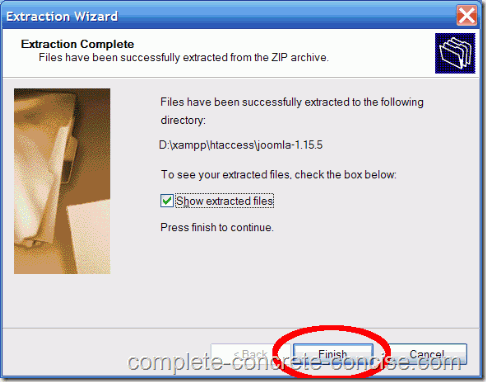
4) Extract the Joomla! files to a subfolder of htdocs in your XAMPP folder. By default, XAMPP would be installed to your C:\ drive, so you would enter C:\xampp\htdocs\joomla as the directory to extract to. (In my case, I installed XAMPP to my D:\ drive).
5) Click Finish when the extraction is complete.
Setting up Joomla!
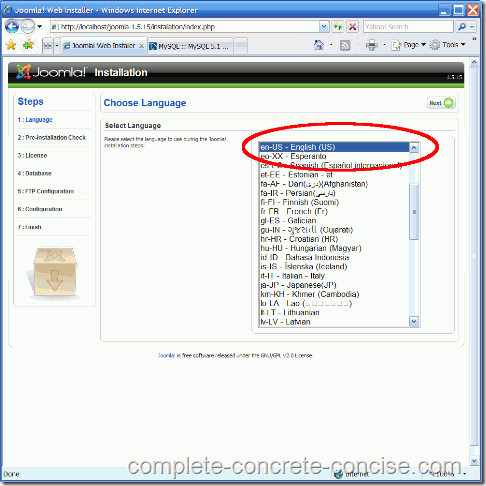
6) Launch your browser and type http://localhost/joomlainto the address bar. What follows http://localhost/ is the directory you installed Joomla! into.
7) Select your preferred language.
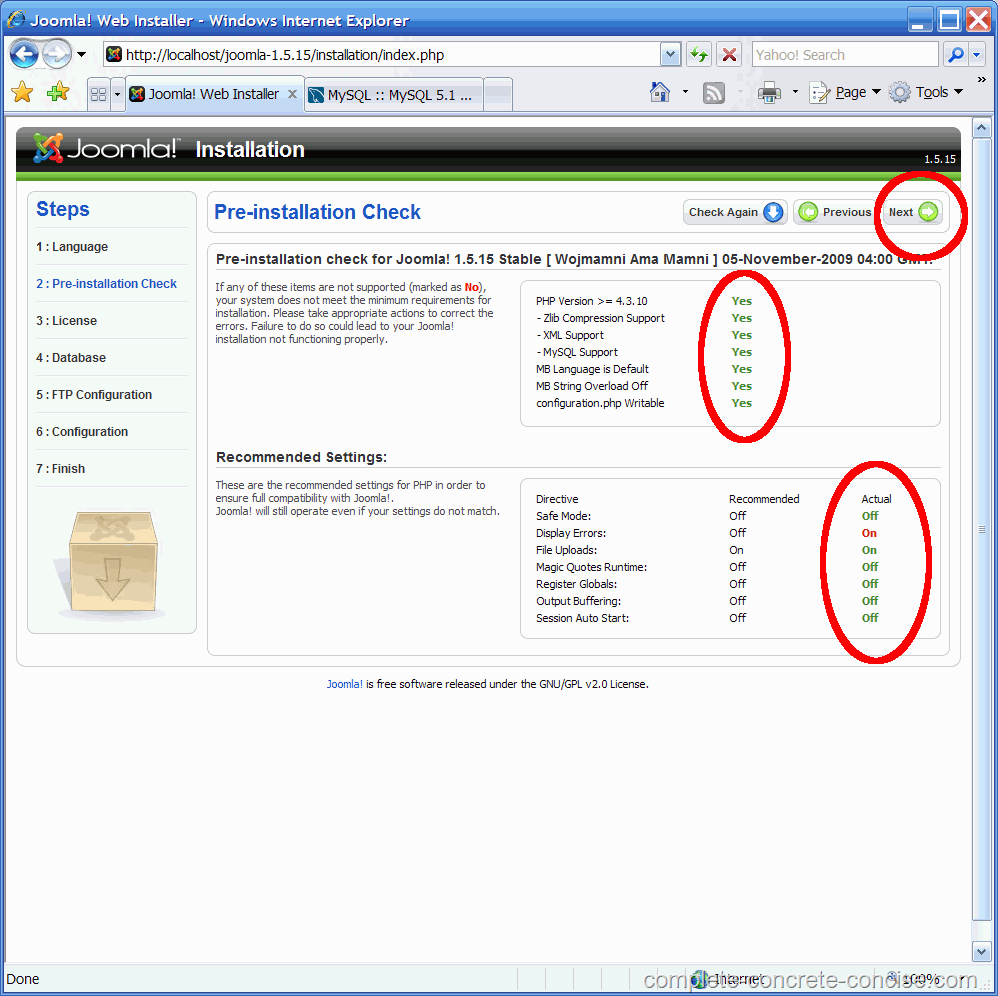
8) Confirm you meet the minimum installation requirements. Then click Next.
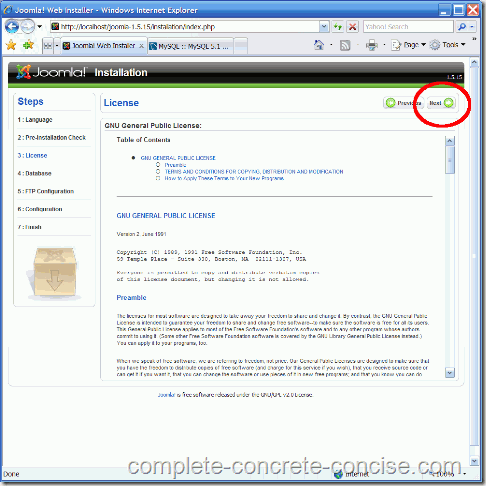
9) Read the GNU license and, if you agree with it, click Next.
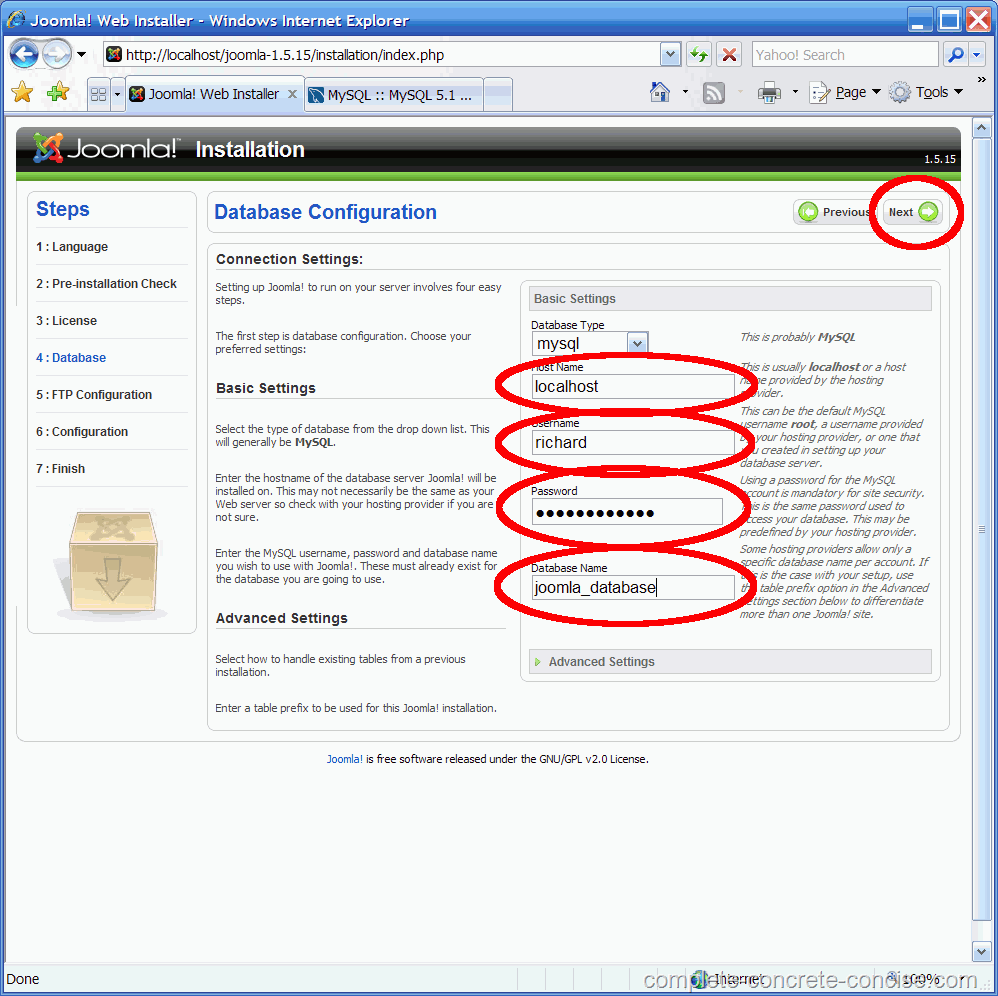
10) Fill in the database configuration information:
- Database Type: mysql
- Host Name: localhost
- Username: if you created a MySql User, you can enter the name here. Otherwise, use root.
- Password: this is the password associated with the user name entered above. If you used root as your username, then leave the password blank (the default XAMPP install does not assign a password to root).
- Database Name: this is the name of the database you created. Database creation instructions are here.
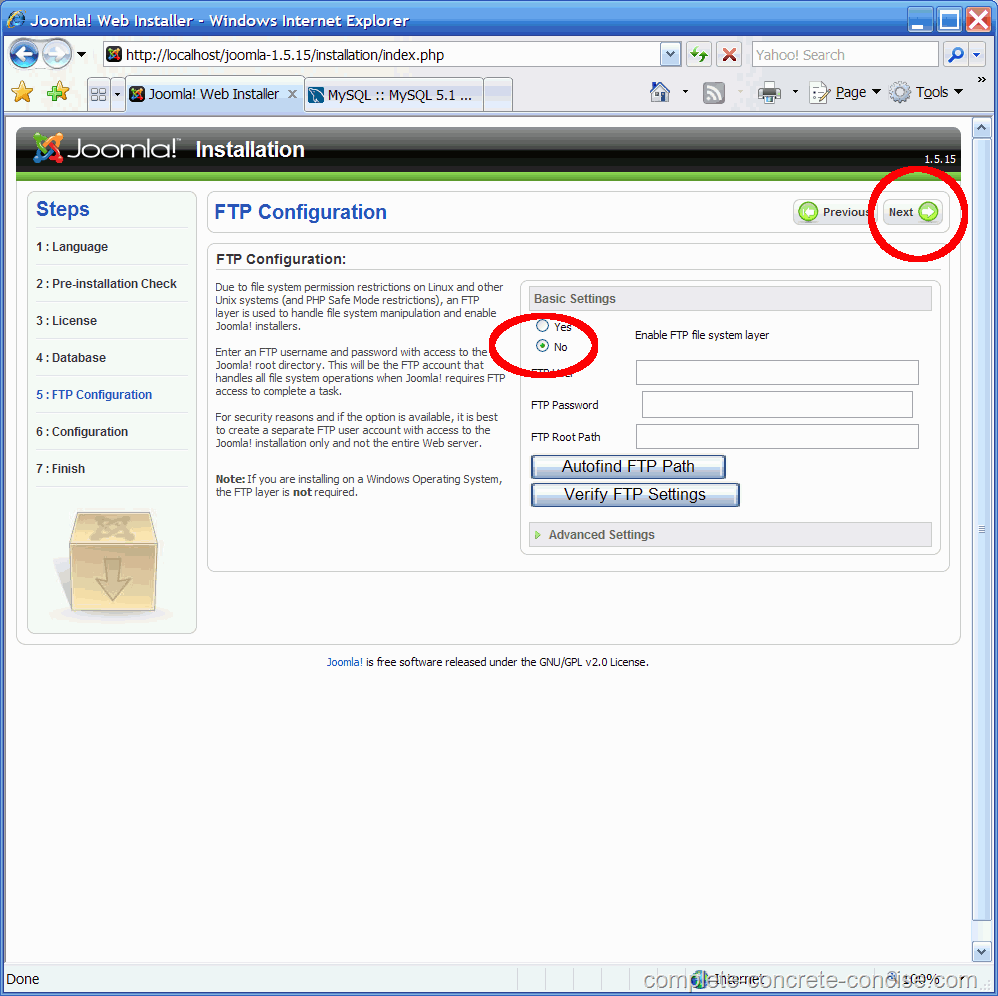
11) Ensure FTP is set to No, then click Next.
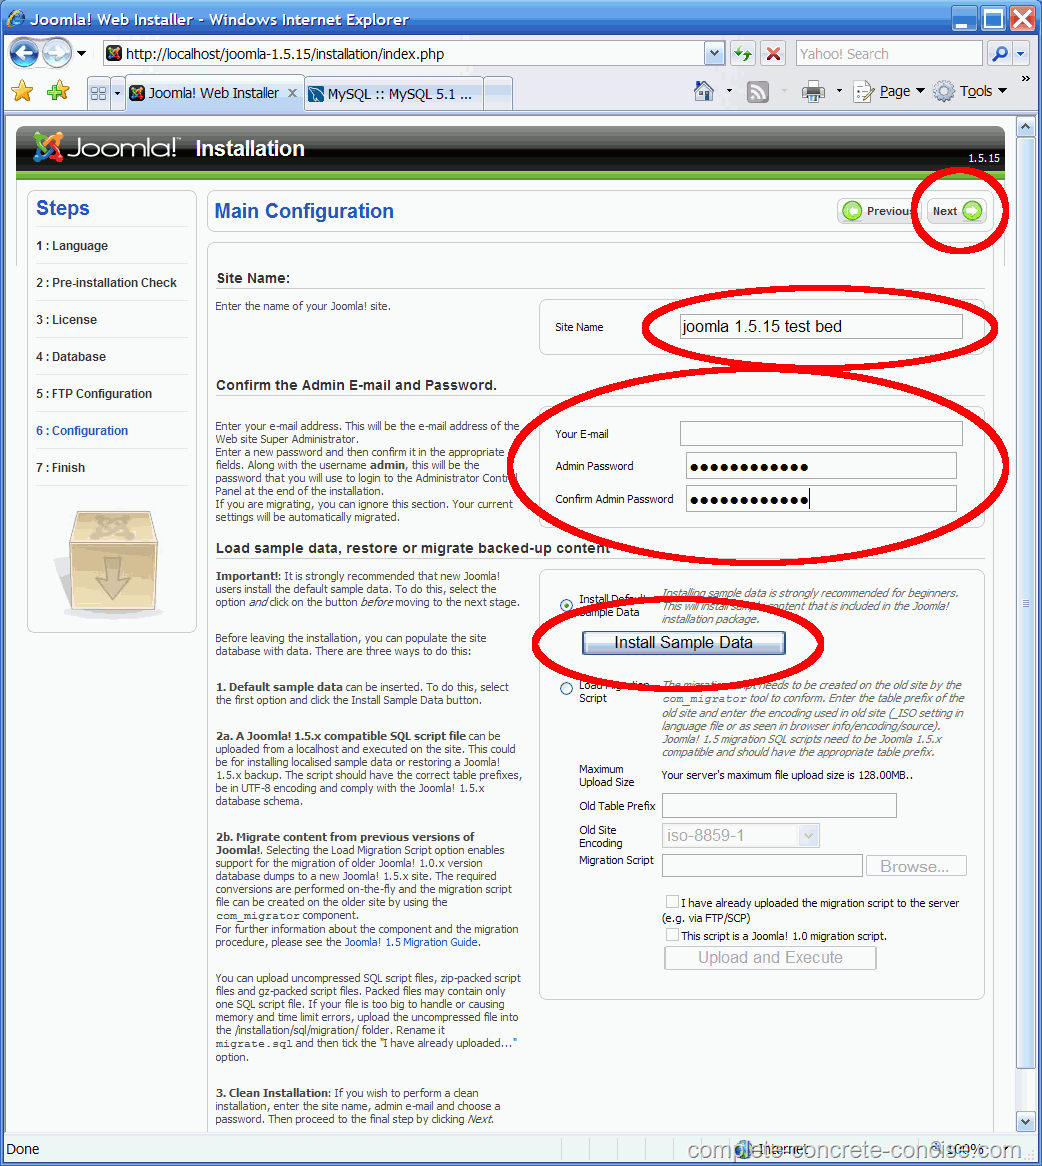
12) Enter a site name (for example, Complete, Concrete, Concise or whatever name you want this site to have). Enter your email address. Enter a password – this is the password you will use to log into the Joomla! backend – your user name will be admin. Choose if you want to install the sample data. I like to install it, since it saves me the trouble of trying to populate the site with test articles.
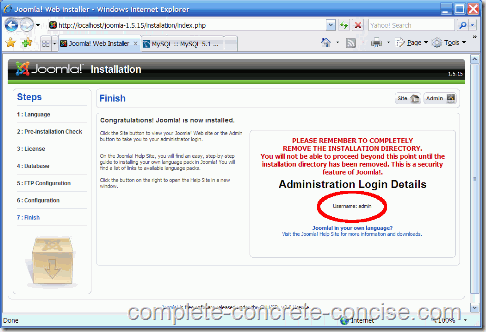
13) Confirm you have successfully installed. Note that your user name for logging into the Joomla! backend is admin.
Cleaning Up
As a security precaution, Joomla! requires you to remove the installation directory before the site becomes functional.
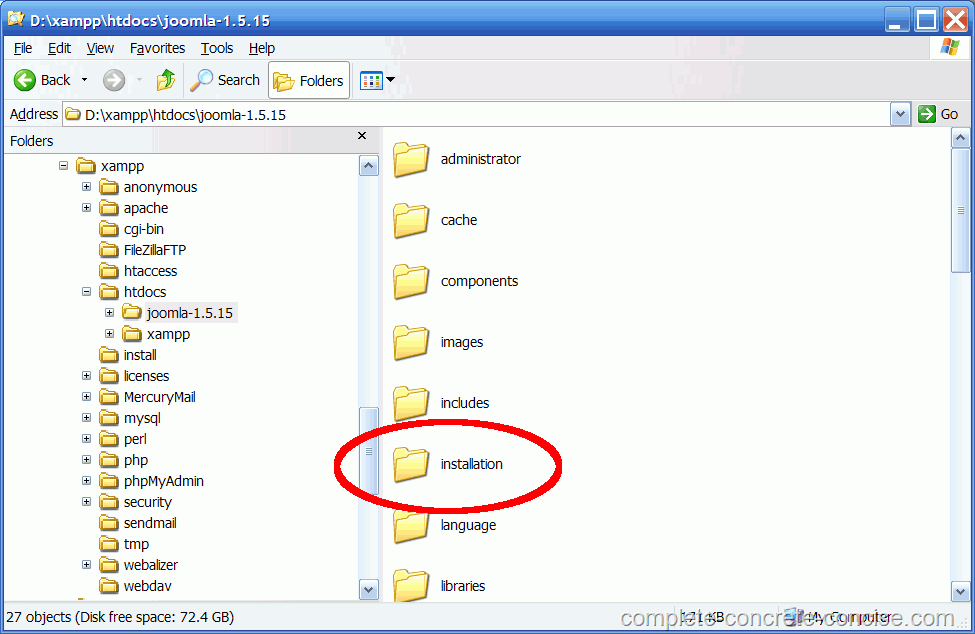
14) Find the Joomla! installation directory. It is directly underneath the Joomla! directory you installed to. You will find it under XAMPP –> htdocs –> Joomla! –> installation.
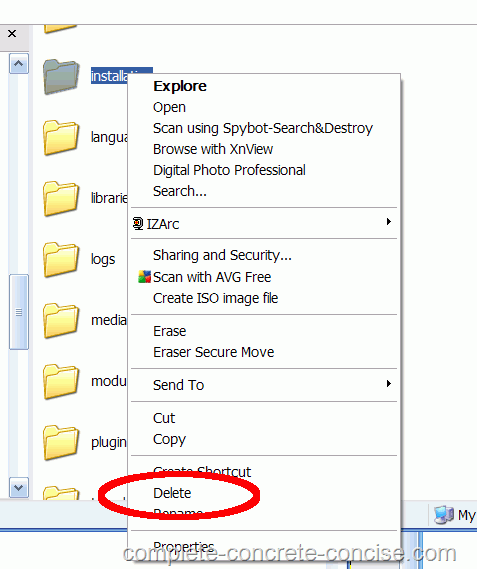
15) Right-click on the folder and select Delete.
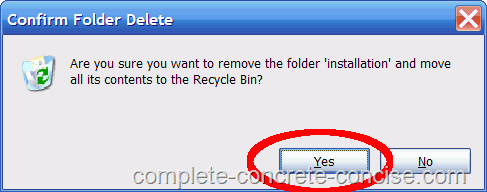
16) Confirm that you want to delete the folder.
You should now be able to access your Joomla! site by entering
http://localhost/joomla
into your web browser’s navigation bar.
To access the backend, you would enter
http://localhost/joomla/administrator
into your web browser’s navigation bar.
If you want to access the installed site using a “real” web address (like www.joomla.15) instead of localhost/path-name, you can find instructions to do that here.

Thanks for posting. I found the older 1.7.3 XAMPP and everything work’s like a charm.
You’re welcome and thanks for the feedback.
Sometimes the latest (and ostensibly, greatest) isn’t the best.
Hi
Very good concide instructions, but I did encounter a problem.
DO NOT REMOVE THE “Installation” FOLDER BEFORE RUNNING “http://localhost/YourJoomlaInstalltionFolder”.
When I ran http://localhost/joomla_1_5_25, I received error
“No configuration file found and no installation code available. Exiting…”
Fortunately I’d renamed the folder instead of deleting it, so was able to recover without having to completely re-install.
HTH
Claire
Yes, of course.
The installation folder is actually needed to install Joomla!
Copying Joomla! into a folder is not the same as installing it.
Thanks for the comment.