These instructions are for Ubuntu 11.10 running under VirtualBox 4.1.8r75467 on Windows 7 with SP1.
They should be the same or similar for other version combinations, but I make no guarantee.
These instructions are the same or very similar for many other distros of Linux, however, the VirtualBox Guest Additions don’t work with all distros of Linux. For some Linux distros the installation does not happen automatically, you have to manually start it.
NOTE: sometimes, after Ubuntu updates have been installed, the Guest Additions will stop working.
See the section When Install Guest Additions… Doesn’t Work below on how to manually run the Guest Installation procedure again.
Why Install VirtualBox Guest Additions?
Installing the VirtualBox Guest Additions better integrates Ubuntu Linux with your system and gives you the following benefits (and more):
- better mouse pointer integration
- shared folders – useful for sharing data between OSes
- better video support – more resolutions, hardware acceleration, etc
- seamless windows (instead of having an Ubuntu desktop and a Windows desktop, the two can be combined together. While neat, it is not quite perfect. I don’t deny it is cool to see a Linux and Windows apps running side-by-side on your Windows desktop)
- shared clipboard
1) Click on on the Devices menu and then select Install Guest Additions…. If you are running Ubuntu in full screen mode, move your mouse to the very bottom of the screen in the middle – this will pop up the same menu options. Alternatively, you can just hold the right Ctrl key down and press the D key (the default Host key is the right Ctrl key):
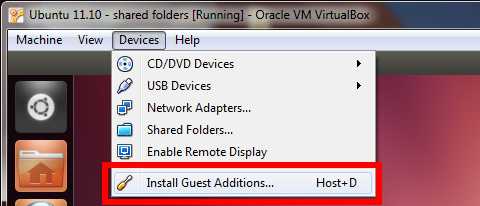
NOTE: in some instances, I have noticed that selecting Install Guest Additions… or pressing Host+D installs the Guest Additions CD but fails to start the install process. If you don’t get the dialog below, please see these instructions at the bottom of the article.
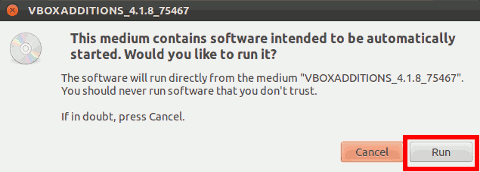
2) Click Run on the information dialog:
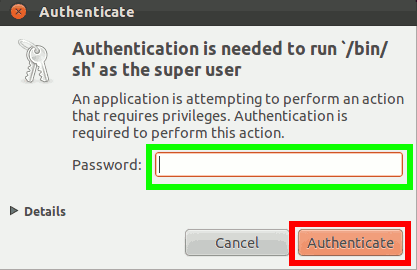
3) Enter your password and then click on Authenticate:
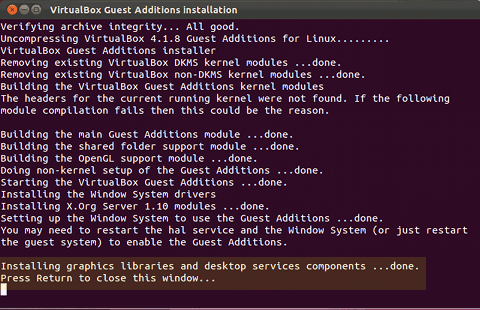
4) A terminal will pop up and inside will be a message about not being able to find the headers. Don’t worry about it:

5) The guest additions will be compiled. This takes several minutes (how long depends on how fast your machine is, how much memory the virtual machine has, etc). Once it is done, you will see a message instructing you to press Enter to close the terminal:
6) Go to the System Tools icon in the top right corner and select Shut Down:
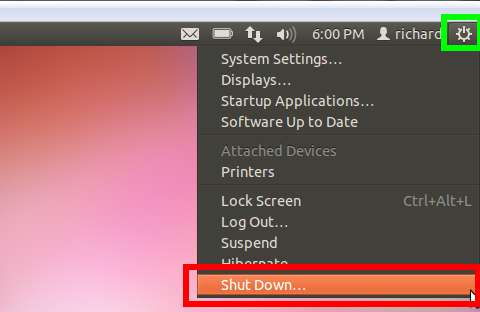
7) Choose to either Shut Down or Restart the system (it doesn’t matter which):
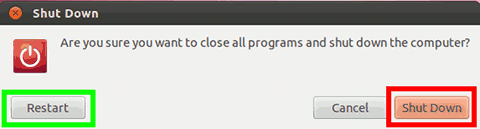
Once the virtual machine restarts, the guest additions will be installed and integrated.
When Install Guest Additions… Doesn’t Work
On rare occasions, I have found that Ubuntu doesn’t start the install process after step 1) above. One of these two techniques should allow you to get around that.
Trick 1
1) Click on the disk near the bottom of the Unity ribbon – it’s just above the trash can:
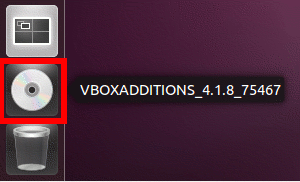
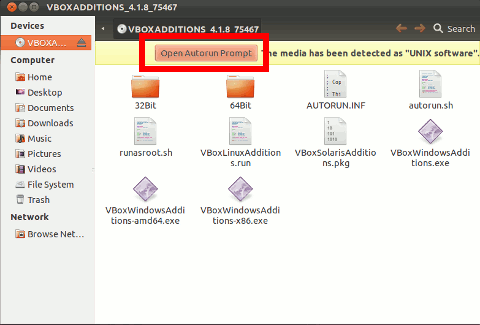
2) Click on Open Autorun Prompt and then continue from step 2) above:
Trick 2
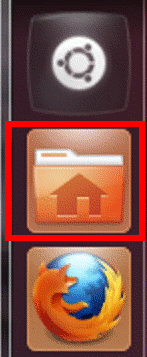
1) Click on the Folder icon:
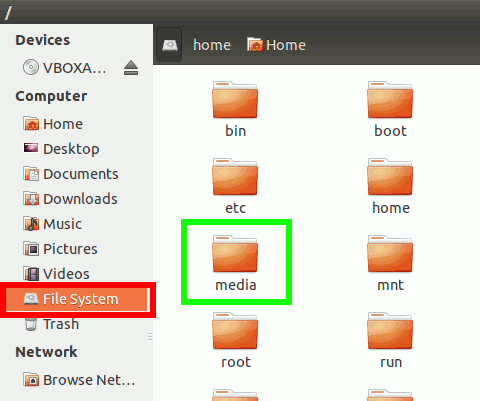
2) Click on File System, then double-click on the media folder:
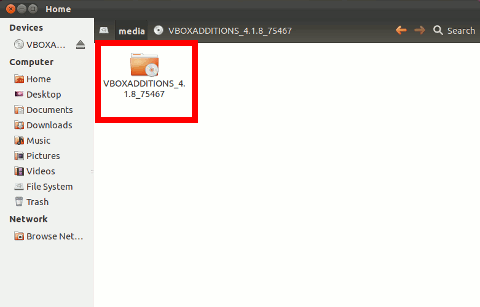
3) Double-click the VBOXADDITIONS icon:
4) Click on Open Autorun Prompt and then continue from step 2) above:
thnks dude! it worked for me!
Thanks for the feedback. I’m glad it was of use to you.
Thank you very much. This was very helpful.
Your welcome. Thanks for the feedback.